

At-Home Whitening Best Practices: Your Safe Results Guide
At-home whitening best practices are defined as the clinically supported protocols that deliver safe, consistent shade improvement without damaging enamel or irritating gum tissue. The gold standard is dentist-supervised custom trays with carbamide peroxide gel, while ADA-accepted hydrogen peroxide strips are the leading over-the-counter option. Both methods work. Both require discipline. Skipping the safety steps is where most people go wrong, and that is exactly what this guide addresses. You will find evidence-backed methods, correct application techniques, sensitivity management, and post-treatment care in one place.
1. What are the top evidence-backed at-home whitening methods?
The most effective at-home whitening method is custom-fitted trays with 10–16% carbamide peroxide gel, used over a 2–4 week period under professional supervision. This approach provides even gel coverage across all tooth surfaces, minimizes gum contact, and achieves 4–8 shades improvement with long-term stability. No other home method matches that combination of coverage and consistency.
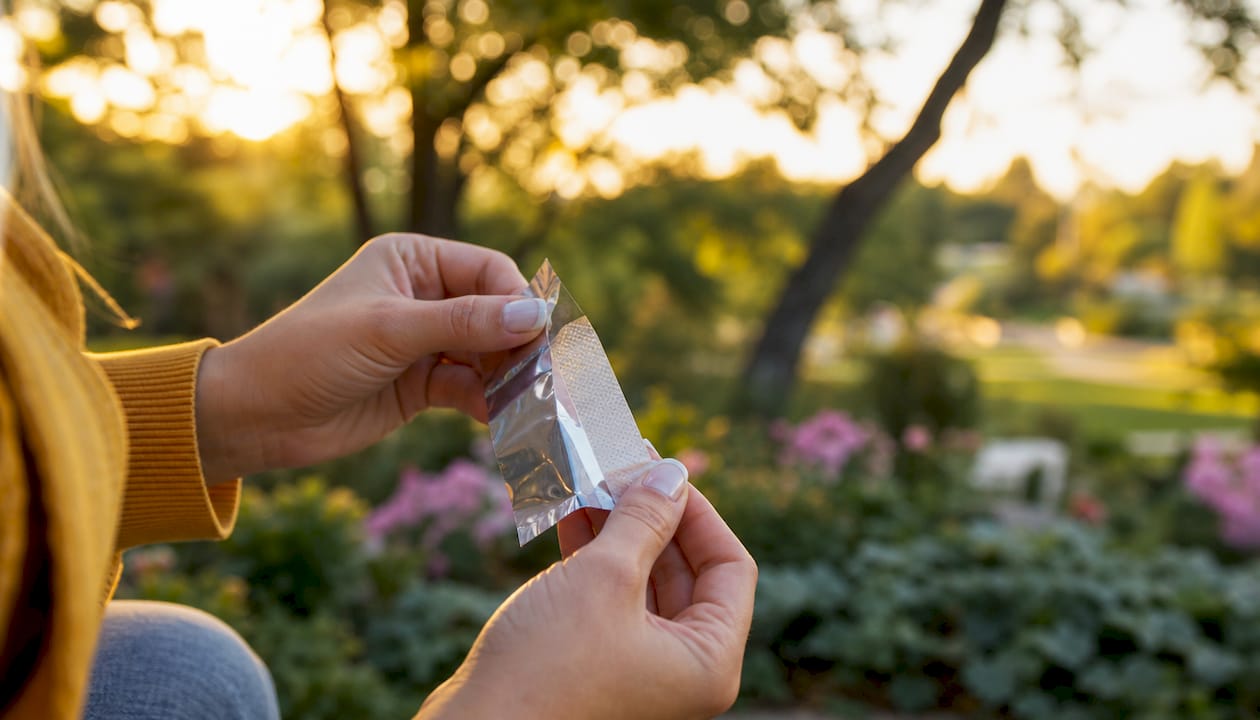
For those without a dentist-prescribed kit, ADA-accepted hydrogen peroxide strips are the strongest over-the-counter option. Products with up to 14% hydrogen peroxide typically deliver 2–5 shades improvement over approximately 20 days. The ADA’s acceptance signals that these concentrations are both safe and effective for unsupervised use.
Natural methods like baking soda paste and oil pulling offer mild, slow results. They are not harmful when used correctly, but they are not a substitute for peroxide-based agents if you want meaningful shade change. Charcoal powder and lemon-plus-baking-soda combinations are a different story. These are abrasive and pose enamel erosion risks, and dental clinicians advise avoiding them entirely.
LED light devices deserve a direct answer: they do not work. LED activation adds no chemical benefit to the whitening reaction and increases sensitivity risk with no whitening gain. Skip the light and put that money toward additional gel instead.
- Custom trays with carbamide peroxide: Most effective; requires a dentist prescription
- ADA-accepted hydrogen peroxide strips: Best OTC option; up to 14% concentration
- Baking soda paste: Mild surface stain removal; not a whitening treatment
- Oil pulling: Minimal evidence for shade change; safe as an adjunct habit
- Charcoal powder: Avoid; abrasive and risks enamel damage
- LED light kits: No proven benefit; skip entirely
Pro Tip: Before purchasing any kit, check whether the product carries the ADA Seal of Acceptance. That seal confirms the concentration and formulation meet established safety standards.
2. How to use whitening trays correctly at home
Correct tray use is the single biggest factor separating good results from patchy, irritated ones. A custom tray fits snugly against every tooth surface without pooling gel onto the gums. When you load the tray, use a small dot of gel per tooth socket, not a full line. Overfilling pushes excess peroxide onto gum tissue and causes irritation that has nothing to do with sensitivity.
Follow this sequence every session:
- Brush and floss before applying the tray. Clean teeth allow peroxide to act directly on enamel, not on plaque.
- Load the tray with the prescribed amount of gel, typically one small dot per tooth.
- Seat the tray firmly and wipe away any gel that squeezes onto the gums with a cotton swab.
- Wear the tray for the time your dentist or the product instructions specify. Do not extend sessions to speed results.
- Remove the tray, rinse your mouth with water, and rinse the tray with cool water. Do not use hot water, as it can warp the tray.
- Avoid eating or drinking anything except water for at least 30 minutes after removal.
For strips, press each strip firmly against the tooth surface starting at the gum line and fold the excess behind the teeth. Avoid touching the gums directly. Remove strips after the instructed time and rinse. Do not swallow the gel.
Pro Tip: If you notice white or chalky patches on your teeth immediately after a session, do not panic. This is temporary enamel dehydration that resolves within 1–2 days as saliva rehydrates the enamel.
Checking your gum health before whitening is a step many people skip. Inflamed or receding gums increase sensitivity and reduce how evenly the gel distributes across tooth surfaces.
3. What are the best practices for managing sensitivity during whitening?
Tooth sensitivity during whitening is common, not a sign that something is wrong. Between 30–50% of people who whiten experience mild, transient sensitivity that resolves within a few days of completing treatment. Knowing this in advance reduces anxiety and helps you stay consistent.
The most effective prevention strategy is starting potassium-nitrate desensitizing toothpaste 1–2 weeks before your first whitening session. Potassium nitrate works by calming the nerve signals inside the tooth, reducing the sharp response to temperature and peroxide contact. Use it as your regular toothpaste, not just a spot treatment.
During treatment, recognize the difference between mild and severe sensitivity:
- Mild sensitivity: Brief, sharp sensation during or just after a session; fades within hours
- Moderate sensitivity: Lingering discomfort for several hours; reduce session time or skip a day
- Severe sensitivity: Persistent pain lasting more than 24 hours; stop treatment and consult a dentist
The most common side effects are mild sensitivity and temporary gum irritation. Both are manageable through dose adjustment and desensitizing agents. You do not need to push through pain to get results.
“Whitening should never hurt. If it does, that is your signal to adjust the concentration, shorten the session, or pause entirely. Discomfort is data, not a badge of commitment. Listening to it protects your enamel and keeps your treatment on track.”
For people with a history of sensitivity during whitening, starting with a lower carbamide peroxide concentration and shorter sessions is the right call. Results take longer, but enamel stays intact.
4. How to maintain and protect your whitening results after treatment
Post-treatment care determines how long your results last. The first 48 hours after whitening are the most critical. Your enamel’s pores are temporarily more open, making teeth more susceptible to re-staining from pigmented foods and drinks.
Follow a white diet for those first 48 hours. That means avoiding coffee, tea, red wine, tomato sauce, berries, and any food or drink with strong color. Tobacco is also a significant staining agent and should be avoided entirely if you want lasting results. The white diet for 48 hours is not optional if you want to protect the shade you worked for.
Long-term maintenance comes down to consistent oral hygiene:
- Brush twice daily with fluoride toothpaste
- Floss once daily to remove plaque from between teeth
- Rinse with water after consuming staining foods or drinks
- Schedule whitening touch-ups every 6–12 months to maintain shade
- Monitor for persistent patchiness beyond two weeks and consult a dentist if it does not resolve
Whitening gels do not lighten dental restorations like crowns, veneers, or fillings. If you have significant dental work, consult a dentist before whitening to set realistic expectations. Natural teeth will lighten while restorations stay the same shade, which can create visible contrast.
| Timeframe | Action |
|---|---|
| First 48 hours | Follow white diet; avoid pigmented foods, coffee, tea, and tobacco |
| First week | Use potassium-nitrate toothpaste if sensitivity lingers |
| Ongoing daily | Brush twice with fluoride toothpaste; floss once daily |
| Every 6–12 months | Schedule a whitening touch-up session |
| If patchiness persists beyond 2 weeks | Consult a dentist for professional evaluation |
Maintaining whitening results long-term also depends on treating whitening as part of your oral hygiene routine, not a one-time event. Consistent oral hygiene and a stain-preventing diet yield better maintenance than whitening products alone.
Key takeaways
Safe, effective at-home whitening requires ADA-accepted peroxide concentrations, correct application technique, proactive sensitivity management, and disciplined post-treatment care.
| Point | Details |
|---|---|
| Use evidence-backed methods | Custom trays with carbamide peroxide or ADA-accepted strips are the only proven options. |
| Follow application instructions exactly | Overfilling trays and extending session times cause irritation without improving results. |
| Manage sensitivity before it starts | Use potassium-nitrate toothpaste 1–2 weeks before your first session. |
| Protect results in the first 48 hours | Avoid pigmented foods and drinks immediately after treatment to prevent re-staining. |
| Whitening is part of oral hygiene | Brushing, flossing, and regular touch-ups sustain shade improvement better than products alone. |
What I have learned from years of watching people whiten at home
The biggest mistake I see is not choosing the wrong product. It is skipping the dentist consultation before starting. A pre-whitening exam identifies issues like cracked enamel, untreated cavities, or inflamed gums that make whitening painful and ineffective. Professional pre-whitening exams prevent sensitivity complications by catching these problems first. That 30-minute appointment saves weeks of discomfort.
The second mistake is expecting home methods to match in-office results. In-office treatments use 20–40% hydrogen peroxide with rubber dam protection. Home-use products max out at 10% carbamide peroxide without professional supervision. That is not a flaw in home whitening. It is a safety boundary that protects your enamel. Realistic expectations make the process far more satisfying.
The third thing I want to address directly: whitening does not replace brushing and flossing. Plaque must be removed for peroxide to reach the enamel surface and work effectively. People who whiten over plaque get uneven results and wonder why. The answer is always the same. Clean teeth first.
Home whitening works. It works well when you follow the protocol, respect the concentration limits, and treat it as an extension of your daily oral care, not a shortcut to a perfect smile.
— Blanca
Blancawhitening’s approach to safe, effective home whitening
Blancawhitening was built by dental professionals who know exactly where home whitening goes right and where it goes wrong. Every product in the at-home whitening collection is formulated with clinically backed ingredients and designed to fit the protocols described in this guide.
Pair a whitening kit with Blancawhitening’s electric toothbrush and water flosser to keep gums healthy and enamel clean between sessions. Clean teeth whiten faster and more evenly. The full oral care collection covers every step from pre-treatment hygiene to long-term maintenance. If you are ready to start, check current offers on the Blancawhitening sales page for the best entry point into a safe, structured whitening routine.
FAQ
What is the safest at-home whitening method?
Custom-fitted trays with 10–16% carbamide peroxide gel, used under dental supervision, are the safest and most effective at-home method. ADA-accepted hydrogen peroxide strips are the best unsupervised option.
How do I fix uneven whitening results at home?
White patches immediately after whitening are usually temporary enamel dehydration and resolve within 1–2 days. If unevenness persists beyond two weeks, consult a dentist, as dental restorations do not respond to whitening gel.
Can minors use at-home whitening products?
Whitening is generally not recommended for individuals under 18. Developing teeth have larger pulp chambers, making them more sensitive to peroxide. A dentist should evaluate any whitening request for minors before treatment begins.
How long do at-home whitening results last?
Results typically last 6–12 months with proper maintenance. Avoiding staining foods, brushing twice daily with fluoride toothpaste, and scheduling periodic touch-ups extend the shade improvement significantly.
What concentration of peroxide is safe without a dentist?
The ADA accepts up to 10% carbamide peroxide (approximately 3.6% hydrogen peroxide) for unsupervised home use. Higher concentrations require professional supervision to protect enamel and prevent chemical irritation.