

How to Use a Water Flosser the Right Way, Every Time
Use a water flosser once a day: fill the reservoir with lukewarm water, attach the right tip, start on the lowest pressure setting, and trace the tip along your gumline at roughly a 90-degree angle to flush out food debris and plaque buildup. Done correctly, this reduces gum inflammation and reaches spots your toothbrush skips. Water flossers work best alongside brushing, and they often complement rather than fully replace string floss when it comes to scraping sticky plaque off tooth surfaces. If you have specific dental conditions, check with your dentist before adding one to your routine.
- Fill with lukewarm water, never hot or ice cold
- Start on the lowest pressure setting
- Aim the tip at your gumline, not straight at your teeth
- Use once daily, ideally in the evening
Key Takeaways
A daily water flosser routine, done at low pressure with correct gumline aim, reduces gum inflammation and reaches debris that brushing and rushed flossing miss.
| Point | Details |
|---|---|
| Start low, aim precisely | Begin on the lowest pressure setting and trace the gumline at a 90-degree angle rather than spraying tooth surfaces. |
| Consistency beats perfection | Daily water flosser use often outperforms sporadic string flossing, according to dental professionals. |
| Sequence matters | Floss with string floss first, flush with the water flosser, then brush for the most thorough clean. |
| Maintain the device | Empty and dry the reservoir after each use, descale monthly, and replace tips roughly every three months. |
| Check with a dentist when needed | Fresh extractions, loose crowns, advanced gum disease, or implanted medical devices call for professional advice first. |
| Choose a beginner-friendly device | The BLANCA water flosser offers adjustable low pressure settings and interchangeable tips suited to this exact routine. |
This article is general information, not a substitute for advice from a qualified doctor. Consult a qualified healthcare professional about your own circumstances before acting on anything here.
Table of Contents
- How to Use a Water Flosser Step by Step
- Getting the Technique Right (and Mistakes to Skip)
- Who Benefits Most, and Who Should Check With a Dentist First
- Cleaning and Maintaining Your Water Flosser
- Where Water Flossing Fits With Brushing and String Floss
- Why Trust This Guide
- What Most Advice Gets Wrong About Water Flossing
- Building a Routine That Actually Sticks
- Sources
How to Use a Water Flosser Step by Step
Getting this right the first time saves you from a soggy bathroom mirror and a sore mouth. Here’s the sequence dental professionals recommend, from filling the reservoir to putting the unit away.
- Fill the reservoir with lukewarm water. Cold water can trigger tooth sensitivity, and hot water is uncomfortable against soft tissue. A small splash of mouthwash is optional if you want extra freshness, but plain water works fine.
- Attach the correct tip and lock it into place. Most units include a standard jet tip for general use, plus specialty tips for braces, implants, or periodontal pockets. Make sure it clicks securely so it doesn’t pop off mid-session.
- Set the pressure dial to its lowest setting. You can always increase it later once your gums adjust.
- Lean over the sink before you turn anything on. Put the tip in your mouth first, close your lips just enough to prevent splashing, and only then switch the unit on. Flipping it on before the tip is between your lips is the fastest way to soak your shirt.
- Aim the tip at your gumline at about a 90-degree angle. Follow the step-by-step technique recommended by dental guides: work slowly, tooth by tooth.
- Move from back teeth to front, covering outer and inner surfaces. Pause briefly between each tooth to let the water stream flush debris from the gap before moving on.
- Keep going for 60 to 120 seconds total. That’s usually enough time to cover your full mouth without rushing.
- Turn the unit off before removing the tip from your mouth. Then empty the reservoir and let it air dry so bacteria doesn’t build up inside.
Pro Tip: Practice over the sink with the water running at first, even before you’ve fully committed to the routine. It takes most people two or three sessions to get comfortable with the angle and pressure, and that’s completely normal.
The whole process takes less than two minutes once it becomes habit, which is shorter than most people spend deciding what to watch while they brush.
Getting the Technique Right (and Mistakes to Skip)
Small adjustments in how you hold and aim the tip make a bigger difference than which model sits on your counter. Pressure is the first variable to get right. Start on the lowest setting and increase gradually only if it feels comfortable. Cranking the dial to maximum on day one doesn’t clean any better. It just leaves your gums sore and increases splash.
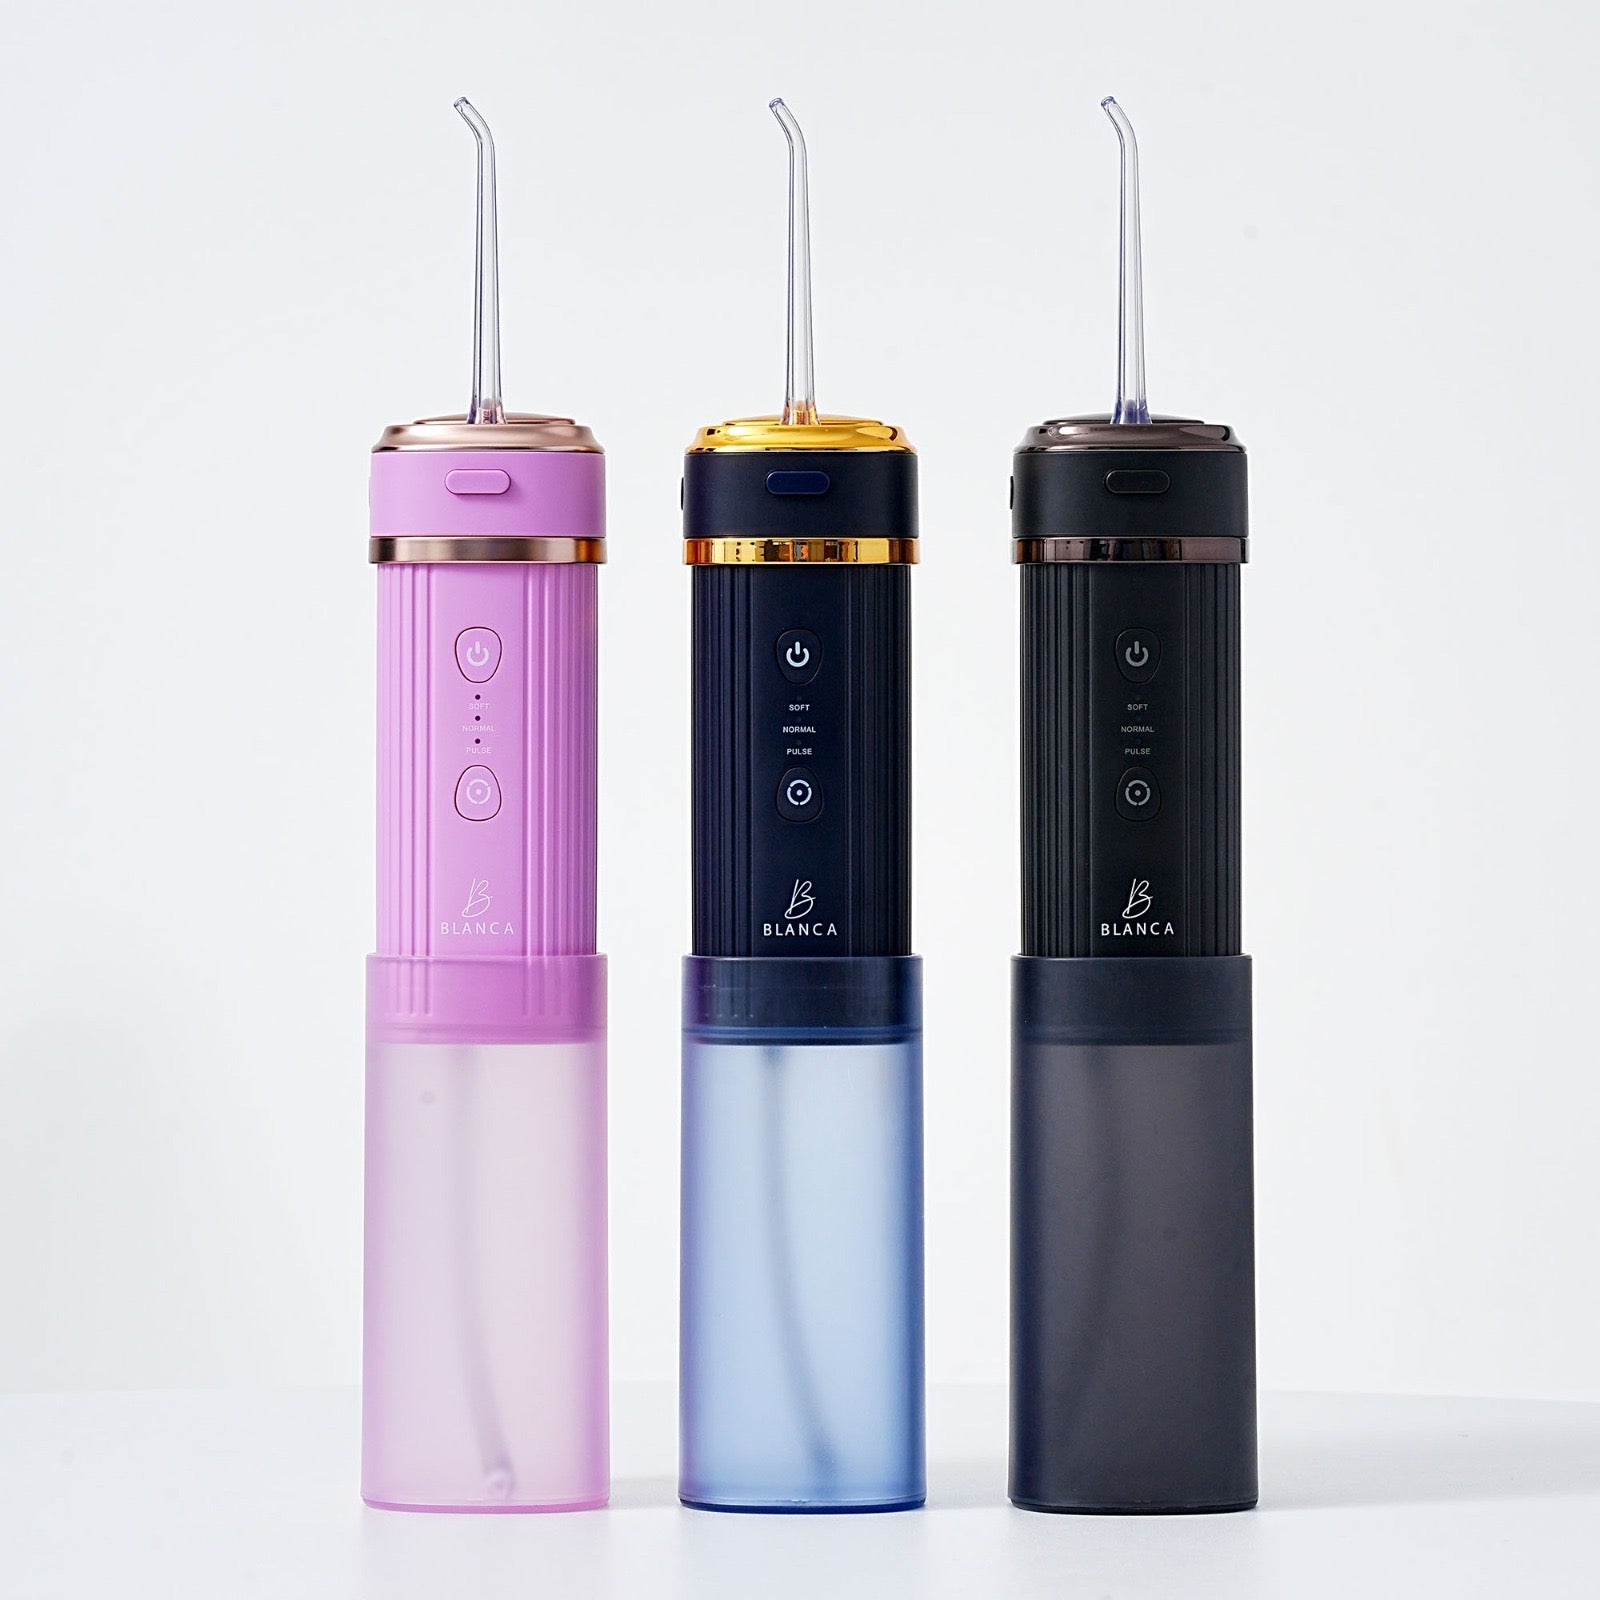
Aim matters more than force. Point the stream at the gumline itself, not directly at the flat surface of your teeth, and trace it slowly rather than spraying across your mouth in quick sweeps. Keep your lips gently closed around the tip to control water flow, and tilt your head slightly forward over the sink so gravity helps rather than fights you.
Watch for these common errors:
- Switching the unit on before the tip is in your mouth
- Rushing through in under 30 seconds
- Holding your mouth wide open, which makes aim harder and increases splash
- Skipping molars and the back of your last teeth because they’re awkward to reach
Mild gum tenderness in the first week is common. Most early users find it eases within a week or two of consistent, correct-pressure use. If soreness persists past that window, dial the pressure back further before assuming the tool isn’t for you.
Who Benefits Most, and Who Should Check With a Dentist First
Water flossers tend to shine for people who struggle with traditional string floss or have hardware in their mouth that makes it awkward. If you fall into one of these groups, a water flosser often makes daily cleaning genuinely easier:
- People with braces, brackets, or wires that trap food
- Anyone with dental implants, bridges, or crowns
- People with arthritis or limited hand dexterity who find string floss difficult to maneuver
- Anyone who simply won’t floss consistently with string, since dental professionals consistently note that regular water flosser use beats sporadic string flossing
A few situations call for caution. If you’ve had a tooth pulled recently, have a loose crown or bridge, are managing advanced gum disease, or have an implanted medical device like a pacemaker, talk to your dentist or doctor before starting. If your gums keep bleeding after two full weeks of correct, gentle use, that’s a signal to book a checkup rather than push through it.
Cleaning and Maintaining Your Water Flosser
A water flosser that sits damp and unwashed defeats its own purpose. Keeping it clean is quick, and it protects both the device and your mouth.
- After every use, empty the reservoir completely and let it air dry. Rinse the tip under running water to clear out any trapped debris.
- Run plain water through the unit for a few seconds after your last daily use to flush the internal tubing.
- Once a week, wipe down the base and reservoir with a damp cloth to prevent mineral buildup around the seams.
- Once a month, descale the unit, especially if you live somewhere with hard water. A diluted vinegar solution run through the reservoir clears mineral deposits that plain water leaves behind, a step Dental recommends for keeping pressure consistent.
- Replace tips roughly every three months, or sooner if bristles fray or the tip cracks. Never share tips between household members. If you also wear a retainer, the same hygiene logic applies. Cleaning it properly matters just as much as descaling your flosser.
Fresh replacement tips are worth keeping on hand so you’re never tempted to stretch one past its useful life.
Where Water Flossing Fits With Brushing and String Floss
The order you clean in actually matters. Floss first with string floss to physically dislodge sticky plaque from between teeth, then run the water flosser to flush out what got loosened, and finish by brushing for two minutes. Water flossers excel at reducing gum inflammation and clearing debris that brushing alone leaves behind, but string floss still does a better job of mechanically scraping plaque off tooth surfaces.
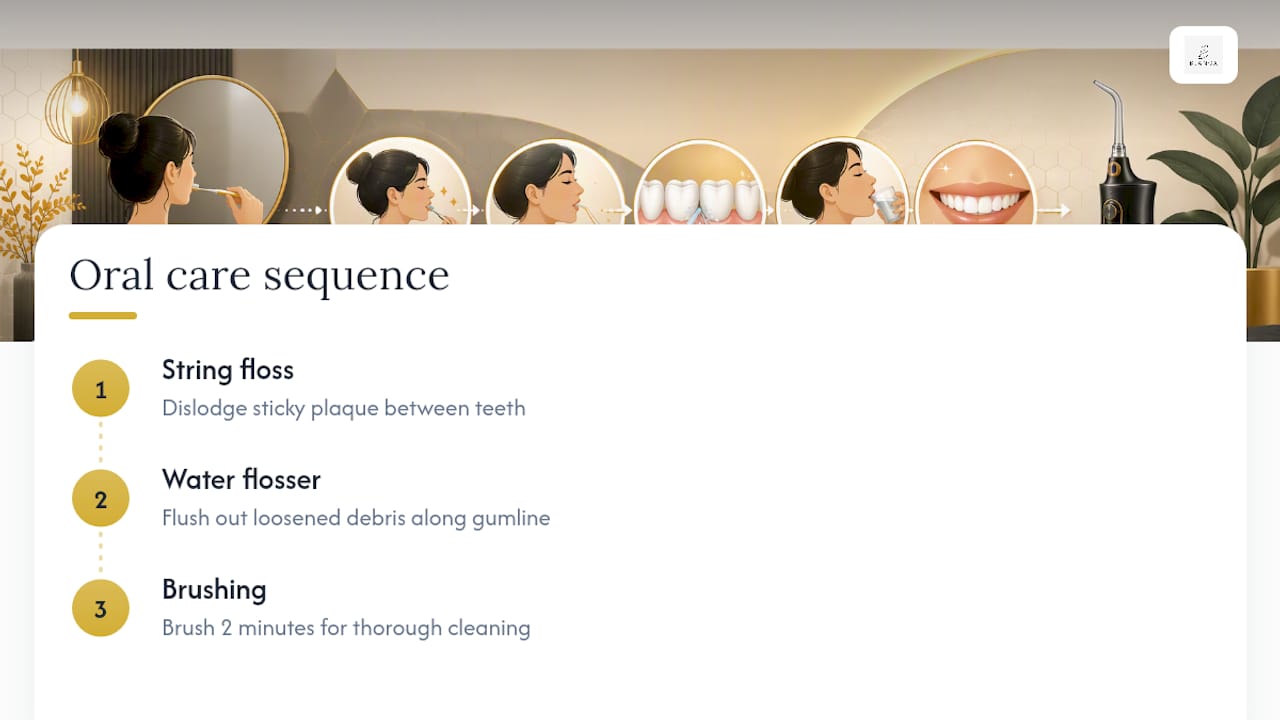
If you’re only ever going to reliably do one of the two, most clinicians would rather you use a water flosser every night than floss with string once a month. A simple nightly routine: brush, floss with string floss if you can manage it, then finish with 60 to 90 seconds of water flossing along the gumline.
Why Trust This Guide
Blanca is a Canadian, dental-led oral care brand built by professionals who design products around how teeth and gums actually respond to daily care, not just how a device looks on a shelf… That perspective shapes every step in this guide, from pressure settings to aftercare.
- BLANCA’s water flosser is designed with beginner-friendly pressure controls and interchangeable tips for different needs
- For home routines, countertop-style units are generally favored for their larger reservoirs, while cordless models suit travel
- Explore the BLANCA water flosser or read more in Water Flossing: The Secret to a Cleaner, Healthier Smile
What Most Advice Gets Wrong About Water Flossing
Most guides treat water flossers like a magic upgrade that erases the need for technique. It doesn’t work that way. The pressure dial gets far more attention than it deserves, when the angle of the tip against your gumline is what actually determines whether debris gets flushed out or just sprayed around your mouth.
The bigger blind spot is consistency. People chase the “perfect” flossing routine, string floss every night, precise technique, ideal order, and end up doing none of it reliably. The research on this is clear: a water flosser used imperfectly every single day outperforms string floss used correctly once a week. If you’re choosing between a routine you’ll actually stick with and one that only works on paper, pick the one you’ll do tonight.
Start simple. Low pressure, correct angle, once a day. Build from there instead of trying to perfect every variable before you begin.
Building a Routine That Actually Sticks
Consistency beats perfection, and that’s exactly where Blancawhitening fits into your evening routine. Rather than juggling multiple brands and guessing which tips or replacement parts match your device, the BLANCA water flosser comes with a beginner-friendly pressure range and tip options built specifically for the technique this guide walks through.
If you’re ready to build a full nightly routine rather than patch one together from different brands, browse Blanca’s oral care collection for toothbrushes and floss designed to work alongside your water flosser. And if brighter teeth are part of your goal alongside healthier gums, the at-home teeth whitening lineup pairs naturally with a solid daily hygiene habit. Pick up the water flosser today and start your first session tonight, low pressure, steady angle, sixty seconds a side.
Sources
- Do water flossers work? — Cleveland Clinic
- How to Use a Water Flosser Properly: Ontario dentist tips
- Dental
- Waterpik vs. Flossing: Uses, Benefits and Comparison — WebMD