

Get Whiter Teeth in 2–4 Weeks: Clinician Backed Custom Tray Whitening
Custom tray whitening is a professional-grade, at-home approach that delivers gradual, even results with far less gum contact than one-size-fits-all kits. It suits adults who want controlled whitening they can manage on their own schedule, with a lower risk of the soft-tissue irritation that comes from ill-fitting trays. The best results still come from following clinician-backed instructions on gel strength and wear time.
TL;DR:
- Custom tray whitening provides a precise fit that ensures even gel contact and minimizes gum irritation, with turnaround times ranging from days to weeks.
- Using the correct gel amount, trimming trays properly, and following recommended wear times significantly reduce sensitivity and side effects.
- Results typically become visible within one week, with full whitening often achieved over two to four weeks, depending on gel strength and consistency.
- Carbamide peroxide gels are suited for overnight use at lower concentrations, while hydrogen peroxide gels are better for shorter daytime sessions.
- Cost varies based on fabrication method, gel strength, and support, with online kits generally being less expensive but offering less clinical oversight.
Table of Contents
- What Are Custom Whitening Trays and How Do They Work?
- How Are Custom Trays Made: Impressions, Scans, and Lab Work?
- How Do You Use Custom Trays Safely?
- What Side Effects Should You Expect, and How Do You Reduce Them?
- What Results and Timeline Can You Realistically Expect?
- How Do You Clean, Store, and Troubleshoot Custom Trays?
- What Types of Whitening Gel Work With Custom Trays?
- What Does Custom Tray Whitening Cost?
- Who Is a Good Candidate for Custom Tray Whitening?
- What Are the Limitations of Custom Tray Whitening?
- How We Think About Safe, Effective At-Home Whitening
- Which Blanca Products Support Your Custom Tray Routine?
- Sources
What Are Custom Whitening Trays and How Do They Work?
A custom whitening tray is a thin, form-fitted shell molded to your own teeth. It holds a peroxide-based whitening gel snugly against your enamel, giving the active ingredient consistent contact time instead of the gaps and slippage common with generic boil-and-bite trays.
That tight seal is the whole point. When a tray matches your dental arch precisely, gel spreads evenly across every tooth surface rather than pooling on the front four and starving the back molars. Custom-fit trays also limit how much gel migrates onto the gums, which is where most whitening discomfort actually starts.
Two whitening agents dominate this category, and the difference matters:
- Carbamide peroxide breaks down slowly, making it common in overnight formulas at lower strengths.
- Hydrogen peroxide acts faster and is typically used in shorter daytime sessions at higher concentrations.
Higher concentrations whiten faster but raise sensitivity risk. That is why a dentist or a clinician-designed protocol should set your starting concentration, especially if you have a history of sensitive teeth or thin enamel.
How Are Custom Trays Made: Impressions, Scans, and Lab Work?
Getting a tray that actually fits starts with capturing the exact shape of your teeth, either the old-fashioned way or with modern scanning tech.
- Impression or scan. A dental office or an at-home kit captures your bite using a physical impression (a putty mold) or an intraoral digital scan.
- Model creation. That data becomes a 3D-printed reference model of your dental arch, a step that has largely replaced hand-poured plaster casts in modern labs.
- Thermoforming. A plastic sheet, often a material like LDPE, is heated and vacuum-formed directly over the printed model, capturing every contour.
- Trimming. Technicians trim the tray below the gumline to protect gingival tissue and can add small reservoirs to hold extra gel over specific teeth.
Material stiffness and reservoir depth both affect comfort. A softer tray flexes more but can leak; a stiffer one seals tighter but may feel bulkier the first few nights. Turnaround typically runs from a few days for in-office fabrication to a couple of weeks for mail-order impression kits.
How Do You Use Custom Trays Safely?
Getting the routine right matters as much as the tray itself. Rushing the gel application or ignoring the schedule your provider recommends is the fastest way to end up with sore gums instead of a brighter smile.
Start every session the same way:
- Brush and floss first so the gel contacts clean enamel, not plaque.
- Dry your teeth if your instructions call for it. This helps the gel adhere instead of diluting.
- Place gel only in the tray’s reservoirs, or run a thin, pea-sized line along the front of each tooth. More gel does not mean faster results. It usually just means more gum irritation.
- Seat the tray firmly, then wipe away any gel that squeezes out along the gumline.
From there, you’re choosing between two common protocols. Short daytime sessions of roughly 10 to 60 minutes suit people prone to sensitivity, since less contact time means less irritation. Overnight wear can produce stronger cumulative whitening, but it demands a gel strength your gums can tolerate for six to eight hours, which is exactly why professional oversight for concentration and duration matters more for nighttime use than for a quick daytime pass.
Pro Tip: If your gums start tingling mid-session, don’t push through it. Remove the tray, rinse, and shorten your next session rather than waiting for the discomfort to pass on its own.
If sensitivity or gum soreness shows up two sessions in a row, pause treatment for 24 to 48 hours. Review our at-home whitening best practices guide for a fuller walkthrough of pacing your sessions.
What Side Effects Should You Expect, and How Do You Reduce Them?
Tooth sensitivity and gum irritation are the two complaints that come up most with tray-based whitening, and both trace back to the same handful of causes: too much gel, too high a concentration, or too many consecutive days of use without a break.
Gel that sits on the gums rather than the tooth surface is the leading cause of soft-tissue irritation. A tray trimmed too close to the edge, or one that has lost its shape, lets gel seep exactly where you don’t want it. Overuse compounds the problem. Enamel needs recovery time between whitening cycles, similar to how skin needs recovery time between exfoliation sessions.
Practical ways to cut your risk:
- Use only the gel amount your instructions specify. Skip the “more is faster” instinct.
- Have your tray trimmed or re-trimmed if it extends past the gumline.
- Switch to a desensitizing toothpaste a few days before starting.
- Shorten session length before you increase gel concentration.
Clinical and practice-based sources describe sensitivity as the most commonly reported side effect of peroxide-based whitening, though it is generally temporary and resolves once treatment pauses. If soreness lasts more than a couple of days after stopping, book a dental check rather than guessing at the cause.
What Results and Timeline Can You Realistically Expect?
Whitening with custom trays is a gradual process, not an overnight transformation. Most people notice a visible shade change within the first week, with fuller results building over two to four weeks depending on gel strength and how consistently you wear the tray.
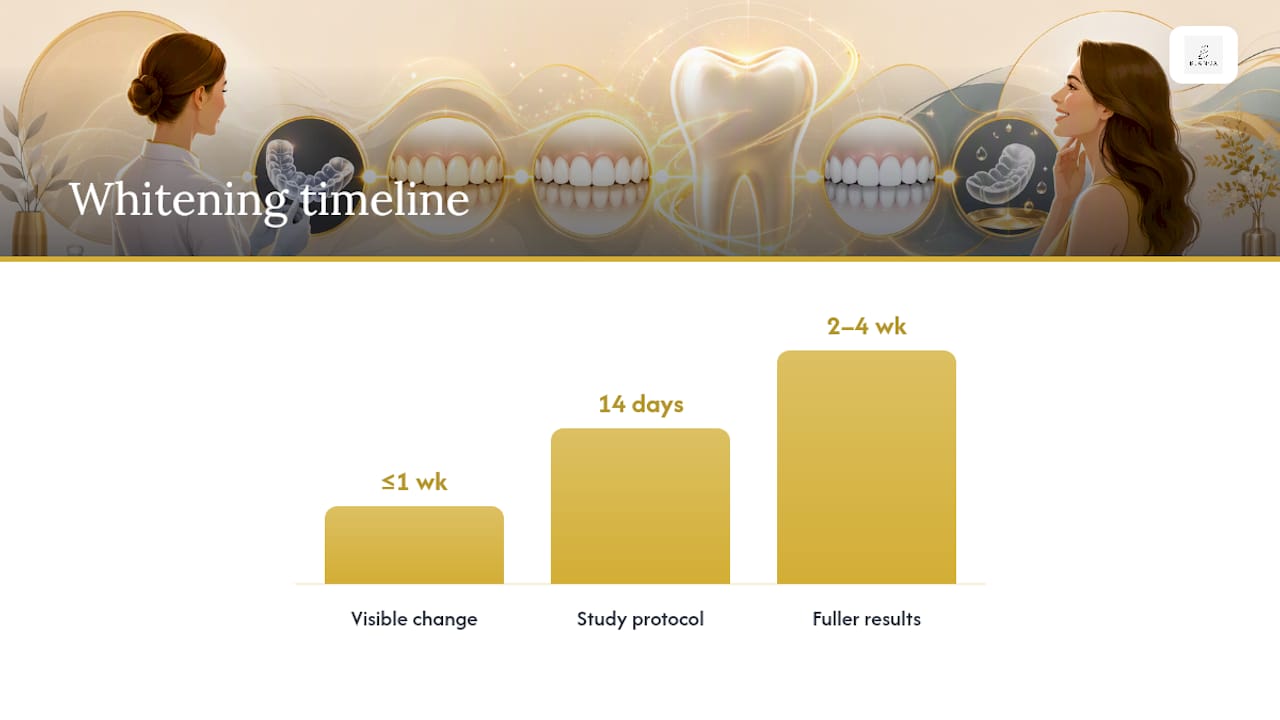
A 2022 study on digitally manufactured custom trays tracked patients through a 14-day nighttime protocol and reported measurable shade improvement alongside high patient satisfaction with comfort and fit. That timeline lines up with what most tray-based kits recommend, whether they’re single-week touch-up formulas or fuller multi-week protocols.
How long results last depends heavily on habits:
- Coffee, tea, red wine, and tobacco all speed up re-staining.
- Consistent brushing and flossing slow the return of surface stains.
- Occasional touch-up sessions with your existing tray maintain your shade without a full re-treatment.
Track progress with a shade guide and photos taken in the same lighting each week. It’s a more reliable gauge than checking in the bathroom mirror, where lighting shifts your perception day to day.
How Do You Clean, Store, and Troubleshoot Custom Trays?
A tray is only as good as its fit, and fit degrades faster when it isn’t cared for properly.
- Clean after every use. Rinse with room-temperature water and brush gently with a soft toothbrush and a small amount of mild soap. Skip hot water. It warps the plastic.
- Store dry. Keep trays in their case, away from direct sunlight or heat sources like a car dashboard.
- Watch for replacement signs. A tray that feels loose, has visible cracks, or carries a persistent odor even after cleaning needs to be remade.
- Troubleshoot minor gaps. A small gap near one tooth is often fixable with a quick trim adjustment from your provider rather than a full remake.
If you ordered trays online, confirm the seller’s return and exchange policy before your kit ships. Standard consumer-return guidance recommends checking these terms in advance, since custom-fitted items are sometimes excluded from standard refund windows.
What Types of Whitening Gel Work With Custom Trays?
Not every whitening gel behaves the same way once it’s sealed inside a tray, and picking the wrong strength for your schedule is a common mistake.
Carbamide peroxide gels release roughly a third of their concentration as active hydrogen peroxide, spread out over several hours. That slow release makes carbamide peroxide the standard choice for overnight wear. A 16% carbamide gel behaves gently enough for most people to sleep through a full session, though clinicians typically choose the exact strength based on enamel condition and sensitivity history rather than a one-size number.
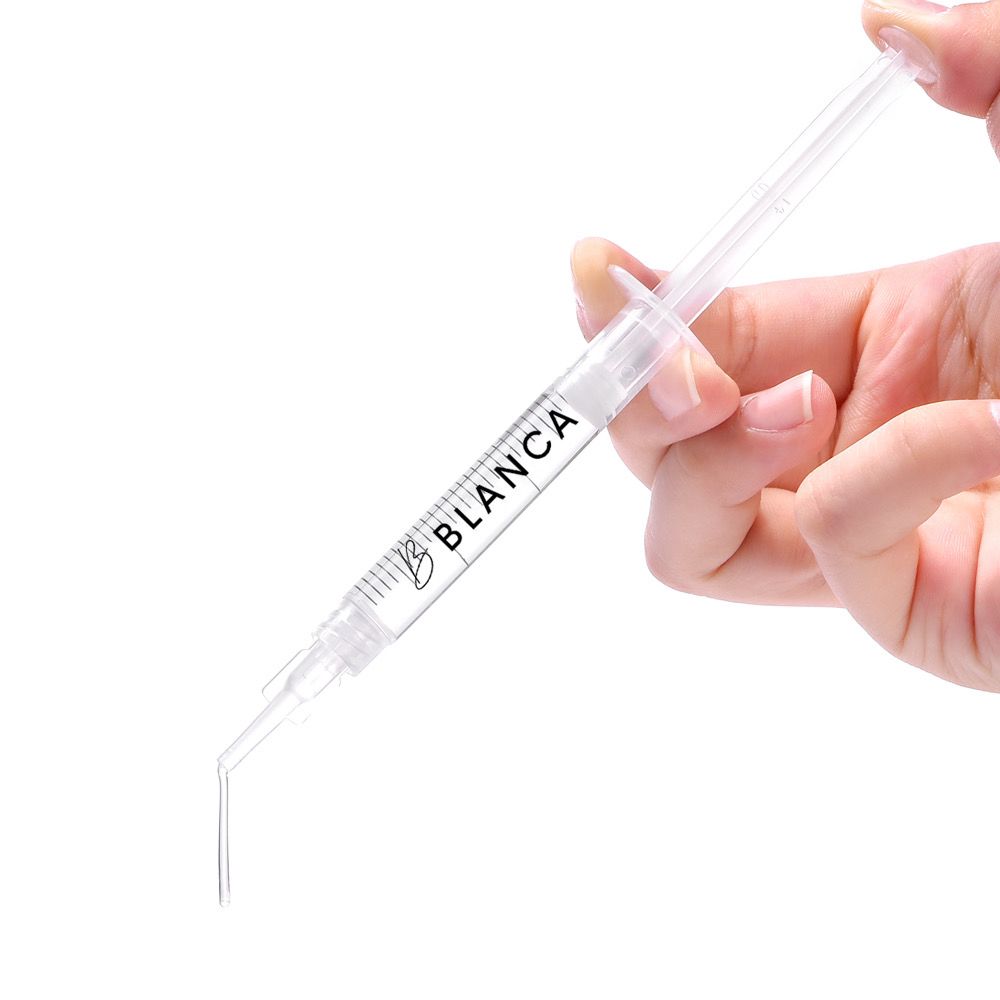
Hydrogen peroxide gels work faster because the peroxide is already active rather than releasing gradually. That makes them well-suited to short daytime sessions of 15 to 45 minutes, but the trade-off is a sharper sensitivity spike if concentration runs too high or sessions run too long.
Beyond the core agent, some gels add extras:
- Potassium nitrate or fluoride blended into the gel to offset sensitivity during treatment.
- Flavored or thickened formulas designed to stay in the tray better and reduce swallowing.
- Remineralizing gels used between whitening cycles rather than during them, to support enamel recovery.
None of these substitutes for proper concentration control. A gentle carbamide gel used incorrectly, with excess volume or extended wear, can irritate gums just as easily as a stronger hydrogen peroxide formula.
What Does Custom Tray Whitening Cost?
Custom tray whitening spans a wide price range depending on where you get your trays made and how much clinical oversight comes with the kit.
At-home custom tray kits ordered online, using a self-taken impression, generally sit at the lower end of the spectrum. These kits bundle an impression material, a lab fabrication fee, and enough gel for an initial multi-week course. Dental office custom trays, made from an in-chair impression or digital scan, cost more because you’re paying for the clinical visit, the professional fitting, and often a stronger prescription-grade gel.
Refill gel is the recurring cost most people underestimate. Once you own a well-fitted tray, replacement gel syringes are a fraction of the initial kit price and can extend your results for months through periodic touch-ups.
A few cost factors worth weighing before you buy:
- Fabrication method. Digital scans at a dental office typically cost more upfront than mail-order impression kits but reduce the chance of a poor-fitting first tray.
- Gel strength and volume. Higher-concentration or prescription-strength gels usually carry a higher price per syringe.
- Follow-up support. Kits or clinics offering fit adjustments or sensitivity guidance after purchase often justify a higher initial cost.
Whichever route you choose, factor in the tray’s reusability. A well-maintained custom tray can support touch-up sessions for a year or more, which lowers your effective cost per whitening cycle over time.
Who Is a Good Candidate for Custom Tray Whitening?
Custom trays work best for people with healthy teeth and gums who want gradual, controllable whitening rather than a single dramatic change. Adults with surface staining from coffee, tea, wine, or tobacco tend to see the most noticeable improvement, since these extrinsic stains respond well to peroxide-based gels.
People with mild to moderate yellowing from natural aging also respond well, particularly with a multi-week protocol that whitens gradually rather than all at once. If you’ve had inconsistent results from whitening strips because they never quite matched your bite, a custom tray solves that fit problem directly.
Certain conditions call for a conversation with a dentist before starting:
- Existing cavities or exposed dentin, which whitening gel can irritate significantly.
- Gum disease or recession, since exposed roots are more sensitive to peroxide.
- Intrinsic stains from medication (like tetracycline) or trauma, which often respond poorly to tray whitening and may need a different approach entirely.
- Existing dental work on visible teeth, since crowns, veneers, and fillings don’t whiten and can end up a different shade than your natural teeth after treatment.
If you’re unsure which category you fall into, a quick dental check before ordering trays saves you from spending money on a protocol that won’t work for your specific staining type.
What Are the Limitations of Custom Tray Whitening?
Custom trays whiten natural enamel and dentin. They do not change the color of crowns, veneers, bonding, or fillings, which means a mouth with visible restorative work can end up with mismatched shades after treatment.
The process is also slower than in-office whitening by design. If you need results before a specific event in the next few days, a single in-office session delivers faster change than a multi-week tray protocol, even though the tray approach often holds its results longer.
Certain groups should avoid tray whitening or get clearance first. Pregnant or breastfeeding people are generally advised to wait, since peroxide exposure during this period hasn’t been well studied. Anyone under 18 typically needs a dentist’s guidance, since enamel development is still ongoing. And whitening gel does nothing for stains caused by cracks, decay, or old metal fillings that have discolored surrounding tooth structure. In those cases, cosmetic dentistry, not whitening gel, is the right fix.
How We Think About Safe, Effective At-Home Whitening
The gap between what most whitening kits promise and what actually happens in someone’s mouth usually comes down to one thing: fit. A tray that doesn’t seal properly turns a controlled treatment into a guessing game, and that’s where most of the sensitivity complaints in this category actually originate, not from the gel itself.
We built our at-home whitening guides and product instructions around that reality. Formulas for tray whitening routines are typically designed to pair with a fit-first approach dentists recommend, and dental checks are advised when staining patterns or history suggest the need.
The honest answer is that no whitening product replaces a dentist’s judgment when something looks unusual in your mouth. Good products make the routine easier. They don’t make the routine unnecessary.
— Blanca
Which Blanca Products Support Your Custom Tray Routine?
If you already have well-fitted trays, the real question becomes which gel and maintenance routine will get you consistent results without wrecking your gums along the way. That’s the gap some product lineups are built to close.
Our at-home teeth whitening collection includes gel formulas designed for tray-based application, alongside desensitizing support for anyone whose gums need a gentler ramp-up. Start with our best-selling bundles if you’re new to tray whitening and want a starter kit with clear instructions built in. Pair your whitening routine with our oral care essentials, including the Blanca electric toothbrush, to keep enamel clean between sessions, since plaque buildup blocks even the best gel from working properly.
It is recommended to read safety guides and choose products that match your sensitivity level; professional guidance may also be sought if needed. Check return policy details before ordering custom whitening kits, as terms can vary for custom-fitted items. Ready to start? Browse the whitening collection and pick the routine that fits your teeth, not just your budget.
This article is general information, not a substitute for advice from a qualified doctor. Consult a qualified healthcare professional about your own circumstances before acting on anything here.
Sources
- A Digital Process for Manufacturing Customized Trays for Dental-Whitening Treatments (2022)
- Custom tray whitening overview — Dr. Drew Randall
- Wilson Custom Whitening Trays — Intentional Dentistry
- Gov