

Yes, Brown Tooth Stains Respond to Whitening (With the Right First Step)
Most brown stains caused by plaque, tobacco, or food respond well to whitening once a dentist confirms they sit on the enamel surface. Deeper, intrinsic stains from trauma, medication, or fluorosis may need restorative treatment instead of bleaching. Before you buy anything, take these steps:
- Book a hygiene appointment so a professional can identify what’s actually causing the discoloration.
- Snap a photo of the stained area in natural light so you and your dentist can track changes.
- Hold off on home peroxide rinses until you know whether the stain is surface-level or internal.
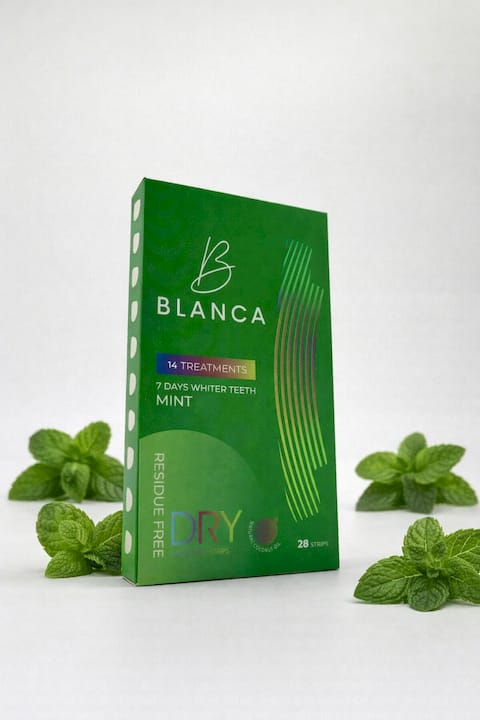
For many surface stains, BLANCA’s at-home whitening strips and maintenance products offer a science-backed way to keep results once your dentist gives the go-ahead.
Key Takeaways
Brown tooth stains respond well to whitening once a dentist confirms the discoloration is extrinsic, but professional cleaning should always come before any bleaching product.
| Point | Details |
|---|---|
| Diagnose before treating | See a dentist first to confirm whether staining is extrinsic (surface) or intrinsic (internal). |
| Clean first, whiten second | Professional scaling or Air-flow polishing often removes surface stains before any peroxide is needed. |
| Match timeline to method | In-office whitening takes about 60 minutes; at-home strips need 10 to 20 days of consistent use. |
| Manage sensitivity proactively | Choose lower-concentration formulas with potassium nitrate to reduce discomfort during treatment. |
| Maintain with the right products | Blancawhitening offers dental-led at-home strips and oral care tools built for post-cleaning touch-ups and long-term upkeep. |
This article is general information, not a substitute for advice from a qualified doctor. Consult a qualified healthcare professional about your own circumstances before acting on anything here.
Table of Contents
- What Causes Brown Tooth Stains, and How a Dentist Diagnoses Them
- Professional Cleaning, In-Office Whitening, and At-Home Strips Compared
- A Step-by-Step Plan for Whitening Brown Stains Safely
- Managing Sensitivity, Gum Irritation, and Enamel Risk
- Keeping Brown Stains from Coming Back
- Why This Guidance Comes from a Dental-Led Brand
- What the Whitening Industry Gets Wrong About Brown Stains
- How BLANCA Supports Your Whitening Plan After Diagnosis
- Sources
What Causes Brown Tooth Stains, and How a Dentist Diagnoses Them
Brown stains fall into two categories, and the distinction determines whether whitening will actually work. Extrinsic stains sit on the outer enamel and come from external contact: coffee, tea, red wine, tobacco, and hardened tartar that traps pigment on the tooth surface. Intrinsic stains form inside the tooth, in the dentin layer beneath the enamel, and typically result from:
- Childhood tetracycline exposure or other medication staining
- Dental fluorosis from excess fluoride during tooth development
- Trauma that damages internal blood vessels
- Untreated decay working beneath the surface
This distinction matters because professional scaling and Air-flow polishing removes deposits mechanically, while whitening changes tooth color chemically. A hygiene appointment usually resolves surface stains almost instantly, which is why dentists treat it as step one rather than an optional add-on before whitening.
Some brown discoloration is a warning sign, not a cosmetic issue. Cleveland Clinic notes that brown or gray tints can point to problems that whitening alone won’t fix. If you notice pitting, visible holes, or pain when biting down, see a dentist before trying any whitening product. Applying peroxide over an active cavity can trigger real pain and make the underlying decay worse.
Professional Cleaning, In-Office Whitening, and At-Home Strips Compared
Three treatment paths handle brown stains differently, and matching the right one to your situation saves time and money.
- Professional stain removal (scaling or Air-flow). A hygienist uses tools or a pressurized powder spray to strip away surface tartar and pigment buildup. Sessions typically run 30 to 45 minutes, and many patients see visible improvement before they leave the chair. This step alone resolves a large share of brown surface stains without any bleaching agent involved.
- In-office professional whitening. For stains that survive cleaning, higher-concentration peroxide applied under professional supervision changes the tooth’s actual color rather than just removing deposits. A typical in-office session runs about 60 minutes, making it the fastest route to a visibly lighter smile. It’s also the option a dentist may recommend for certain intrinsic shades, depending on the cause.
- At-home peroxide treatments (strips and trays). Lower-concentration formulas require more patience. Cleveland Clinic reports that consistent daily use over 10 to 20 days produces noticeable results, which then last several months with basic maintenance.
Each path has trade-offs worth weighing before you commit:
- In-office whitening costs more upfront but delivers results in a single visit.
- At-home strips cost less and fit into a daily routine, but they demand consistency to work.
- Gum contact with high-concentration gel can cause irritation, so proper strip fit matters more than people assume.
When none of these paths lighten the tooth enough, or when the discoloration comes from deep intrinsic damage, a dentist may suggest bonding or veneers. These restorative options physically cover the stain rather than bleaching it away, and they’re the right call when whitening has genuinely reached its limit.
A Step-by-Step Plan for Whitening Brown Stains Safely
Treat this as a sequence, not a menu of options to pick randomly.
- Schedule a hygiene visit first. Ask your dentist directly whether your staining looks extrinsic, intrinsic, or a mix of both. This single conversation prevents wasted money on products that were never going to work.
- Get a professional cleaning. Scaling or Air-flow polishing removes plaque and tartar buildup, and you’ll often see a real difference in the mirror before you even start whitening.
- Choose your whitening path based on sensitivity and stain extent. If you have widespread staining and want fast results, in-office whitening makes sense. If your teeth are sensitive or you prefer a gradual approach, at-home strips or trays fit better.
- Follow use instructions exactly. Stick to the recommended wear time, don’t double up sessions to speed things along, and keep gel off your gum line.
Pro Tip: Take a “before” photo under the same lighting each time you check your progress. Tooth color changes are gradual, and side-by-side photos catch improvement your eyes might miss day to day.
Stop and call your dentist if you notice sharp pain, white patches on your gums, or stains that haven’t budged after a full course of treatment.
Managing Sensitivity, Gum Irritation, and Enamel Risk
Temporary sensitivity is the most common side effect of peroxide whitening, usually felt as a sharp, brief zing when you drink something cold. It happens because peroxide temporarily opens microscopic channels in the enamel on its way to breaking down stain molecules, and it typically fades within a day or two of finishing treatment.
A few product choices lower your risk without sacrificing results:
- Look for formulas that pair a lower peroxide concentration with a longer treatment window rather than a single strong dose.
- Choose products containing potassium nitrate, a common desensitizing ingredient that calms nerve response in the tooth.
- Keep whitening gel off your gums. Healthy, undamaged gum tissue tolerates whitening far better than irritated tissue.
- Skip abrasive DIY scrubs like straight baking soda paste, which can wear enamel down over repeated use.
Pro Tip: If sensitivity hits mid-treatment, switch to a fluoride desensitizing toothpaste for a few days rather than stopping cold. Most people can resume whitening once the discomfort settles.
See a dentist immediately if you experience persistent pain, gum blistering, or white spotting that doesn’t fade within a few days.
Keeping Brown Stains from Coming Back
Whitening results fade if daily habits don’t change. Brush twice a day with a fluoride toothpaste, floss daily, and rinse your mouth with water after coffee, tea, or red wine to limit how long pigment sits on enamel.
A few habit shifts make a bigger difference than any product:
- Cut back on tobacco use, which is one of the fastest ways to redevelop brown staining.
- Drink dark beverages through a straw when possible to reduce direct contact with front teeth.
- Keep up with regular hygiene visits. A cleaning every six months catches new tartar buildup before it stains.
- Space out touch-up strips every few months rather than whitening continuously, and avoid switching to harsh DIY abrasives if results start to fade.
Following a consistent maintenance routine after your initial treatment is what separates results that last six months from results that fade in six weeks.
Why This Guidance Comes from a Dental-Led Brand
Blancawhitening was founded by dental professionals, which shapes how we approach every product we sell. We build our lineup around what actually works for real stains, not shortcuts:
- At-home whitening strips formulated for surface stain removal
- Professional-grade whitening kits used in clinical settings
- Oral care essentials, including electric toothbrushes and water flossers, that support long-term maintenance
What the Whitening Industry Gets Wrong About Brown Stains
Most whitening marketing treats every stain the same way: buy the product, apply it, get white teeth. That’s misleading, and it sets people up to waste money on strips that were never going to touch their actual problem.
The uncomfortable truth is that a meaningful share of brown discoloration isn’t a whitening problem at all. It’s a cleaning problem. Research comparing stain removal to true whitening confirms that professional cleaning resolves many brown surface stains before any peroxide gets involved, yet almost no consumer product ad mentions this. Skipping straight to bleach on a tooth covered in tartar is like painting over dirt.
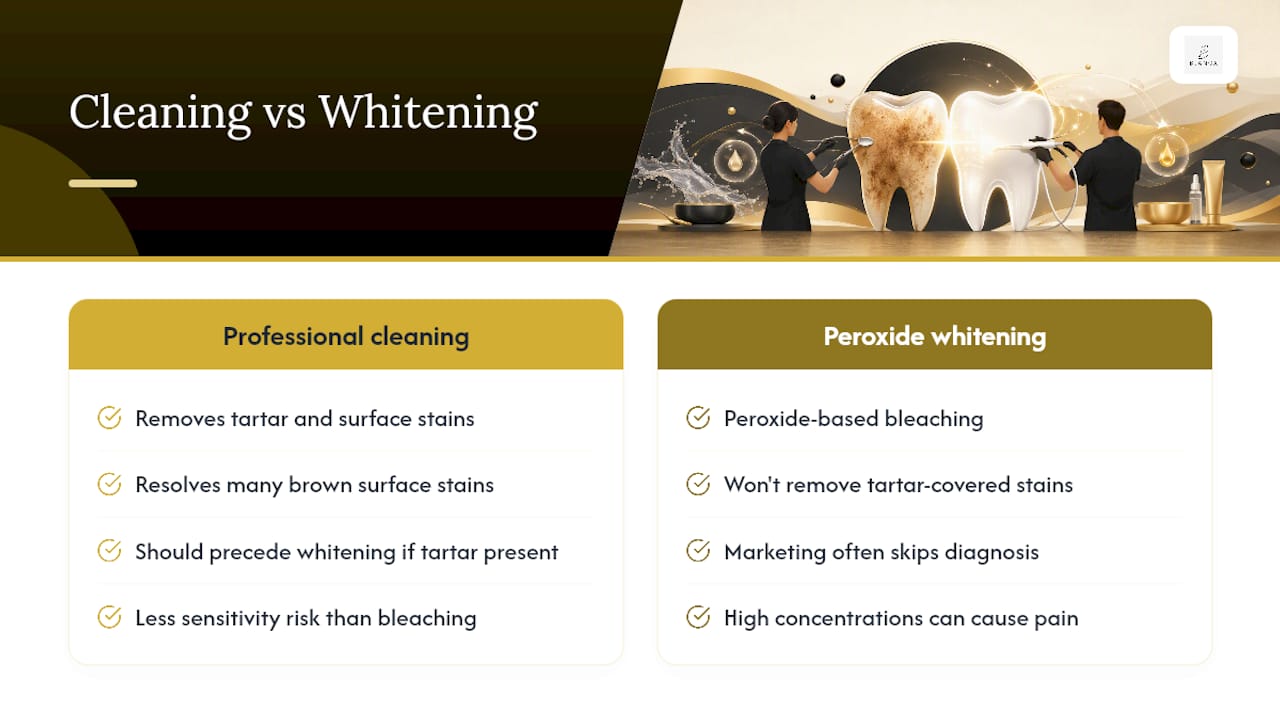
The other place conventional advice falls short is sensitivity. Too many people either avoid whitening entirely out of fear of pain, or push through discomfort with a high-concentration product because “it’s supposed to work faster.” Neither is necessary. A lower-concentration, longer-duration approach with potassium nitrate built in usually gets you comparable results with far less discomfort.
If you take one thing from this: see a dentist before you buy anything. Everything else, including which whitening method you choose, should follow from that diagnosis, not precede it.
— Blanca
How BLANCA Supports Your Whitening Plan After Diagnosis
Once your dentist has cleared you for whitening, Blancawhitening gives you a dental-led product line built specifically around the safety features this article covers, not a one-size-fits-all bleach kit. Our at-home whitening strips are formulated with lower peroxide concentrations and potassium nitrate to limit sensitivity, which matters most for anyone whose brown stains needed a cleaning first and whitening second.
For daily maintenance after your initial treatment, our oral care collection includes electric toothbrushes and water flossers designed to slow new tartar buildup, the same buildup that caused your surface stains in the first place. If you’re ready to start, browse our best-selling whitening products and pick the strip strength that matches your sensitivity level. Your dentist’s diagnosis tells you what you need; our product line gives you a safe way to act on it.
Sources
- Tooth Discoloration: Causes & Treatment — Cleveland Clinic
- How to whiten teeth — Cleveland Clinic (Health article)
- Tooth whitening versus stain removal | BDJ Team