

Gentle Pre Event Teeth Whitening: Start 2–4 Weeks for the Best Results
Most people should start whitening a few weeks before an event. If time is short, in-office whitening delivers the fastest, most predictable results in a single visit, while over-the-counter kits need several weeks to work safely. Anyone with fillings, crowns, active decay, or a history of severe sensitivity should see a dentist first, following Canadian Dental Association guidance, and some brands can help bridge the gap between professional care and at-home upkeep.
TL;DR:
- In-office whitening offers the fastest results with one visit, but should be scheduled 1 to 2 weeks before the event to allow sensitivity to subside.
- Dentist-supplied take-home trays need 1 to 2 weeks of nightly use, requiring a longer lead time but allowing control over sensitivity.
- Over-the-counter whitening strips and toothpaste take several weeks to achieve results and may not whiten restorations like crowns or veneers.
- Starting whitening treatments at least 2 to 4 weeks before the event provides time for shade stabilization and sensitivity reduction.
- Avoid whitening within 48 hours of the event and focus on cosmetic tricks, cleaning, and lighting to optimize your smile’s appearance.
Table of Contents
- Comparing Your Pre Event Teeth Whitening Options
- How Far Ahead Should You Start Whitening?
- What to Do Before You Start Whitening
- Why Do Teeth Get Sensitive After Whitening?
- Protecting Your Results in the Final 48 Hours
- Dentist-Backed Planning
- What Are Your Options for Same-Day or Emergency Whitening?
- Who Should Avoid Whitening Right Before an Event?
- How Lighting and Photography Change the Way Whitened Teeth Look
- The Timing Advice Most People Get Backwards
- Choosing a Blanca At-Home Option for Your Event
- Sources
- FAQ
Comparing Your Pre Event Teeth Whitening Options
The right method depends less on brand preference and more on how much runway you have and how your teeth handle peroxide. Here’s how the three main routes stack up.
- In-office whitening: One appointment, usually under an hour, produces the most dramatic shade change available. Book it 1 to 2 weeks out so any post-treatment sensitivity has time to fade before the big day, as recommended by dental guidance. The ADA notes professional treatments consistently outperform over-the-counter products in speed and depth of result, which makes this the default pick for anyone whitening for a wedding or graduation on a tight clock.
- Dentist-supplied take-home trays: Custom trays with professional-strength gel typically run 1 to 2 weeks of nightly wear, so plan for a few weeks lead time total. You get dentist oversight plus control over how gradually you build up the concentration, which matters if you’ve had sensitivity before.
- Over-the-counter strips and whitening toothpaste: These work, but slowly. Give yourself several weeks for strips to catch up to what a single in-office visit accomplishes, and know that they generally can’t touch up existing crowns, veneers, or bonding since those materials don’t respond to peroxide the way enamel does.
- Quick fixes: A polishing toothpaste, a shade-matched lip color, or simply choosing warmer lighting for photos can sharpen how white your smile looks on the day. Treat these as finishing touches, not substitutes for real whitening.
Cleveland Clinic frames the tradeoff simply: strips work gradually, in-office procedures work fast, and both come with a common, temporary sensitivity trade-off.
How Far Ahead Should You Start Whitening?
Pick your lane based on how many days or weeks stand between you and the event.
- Same day to 48 hours out: Whitening is off the table. Stick to cosmetic tricks, a thorough professional cleaning if you can get one, a good polish, and photo lighting that flatters your existing shade.
- 1 to 2 weeks out: In-office whitening is your best bet if a dentist can fit you in. This window also lets the temporary sensitivity that follows treatment settle before you’re smiling for photos, since shade continues stabilizing for 24 to 48 hours after the procedure.
- 2 to 4 weeks out: This is the sweet spot most dentists recommend. It fits either a dentist-supplied take-home kit or a staged plan combining an in-office session with a touch-up closer to the date.
- 4 to 8+ weeks out: You have room for over-the-counter strips or a longer professional take-home regimen with follow-up checks, which spreads exposure to peroxide over more sessions at a gentler pace.
Before locking in a date, run through a short checklist: schedule a dental exam, confirm whether you have restorations that won’t whiten, note any sensitivity history, and if your event falls within four weeks, book your consult now rather than later.
What to Do Before You Start Whitening
Skipping the prep step is the most common reason people end up with uneven color or unexpected discomfort right before an event.
- Get a dental exam and cleaning first. Cavities and gum disease need treatment before bleaching gel touches your enamel, and a cleaning alone often brightens your smile a shade or two.
- Flag existing restorations. Crowns, veneers, and bonding don’t whiten, so completing natural-tooth whitening before replacing any restoration lets your dentist color-match the new work to your brighter shade instead of the other way around.
- Disclose sensitivity, pregnancy, or medications. Your dentist can recommend a desensitizing pretreatment or adjust the concentration if you mention a sensitivity history upfront.
Professional guidance consistently points to this exam as the step that prevents mid-process surprises, according to the same clinical review that underlies most current whitening protocols.
Why Do Teeth Get Sensitive After Whitening?
Peroxide, whether from a professional gel or a drugstore strip, temporarily opens microscopic channels in enamel that let irritants reach the nerve inside each tooth. That’s why a twinge of sensitivity after whitening is common. It’s also almost always temporary, easing within a day or two as those channels close back up.
You can head it off before it starts. Ask your dentist about a lower-concentration, staggered schedule rather than one intense session, since systematic reviews back staged regimens for reducing discomfort. Using a potassium nitrate desensitizing toothpaste for a few days before you begin also has clinical support for blunting the reaction.
If sensitivity does show up, stop whitening and switch to gentle maintenance rather than pushing through with another treatment days before your event. That instinct to “whiten harder” right before the deadline usually backfires.
Pro Tip: If you’re prone to sensitive teeth, start your desensitizing toothpaste routine a full week before your first whitening session, not the night before. It needs time to build a protective effect.
Protecting Your Results in the Final 48 Hours
The first 24 to 48 hours after any whitening session matter more than people expect, because enamel is temporarily more porous and prone to picking up stains. Stick to a light-colored diet: chicken, rice, pasta with white sauce, and water instead of coffee, red wine, or berries. If you can’t avoid a staining drink entirely, a straw limits contact with your front teeth.
- Keep brushing and flossing as usual, and use a whitening-friendly toothpaste to hold onto your new shade.
- Skip harsh at-home touch-ups the night before the event. Small, steady maintenance beats one aggressive last-minute session.
- Once the event passes, plan periodic touch-ups rather than waiting until your smile has fully faded, since maintenance sessions prolong results far more reliably than a single treatment on its own. Our guide to making whitening results last longer walks through a simple upkeep schedule.
Dentist-Backed Planning
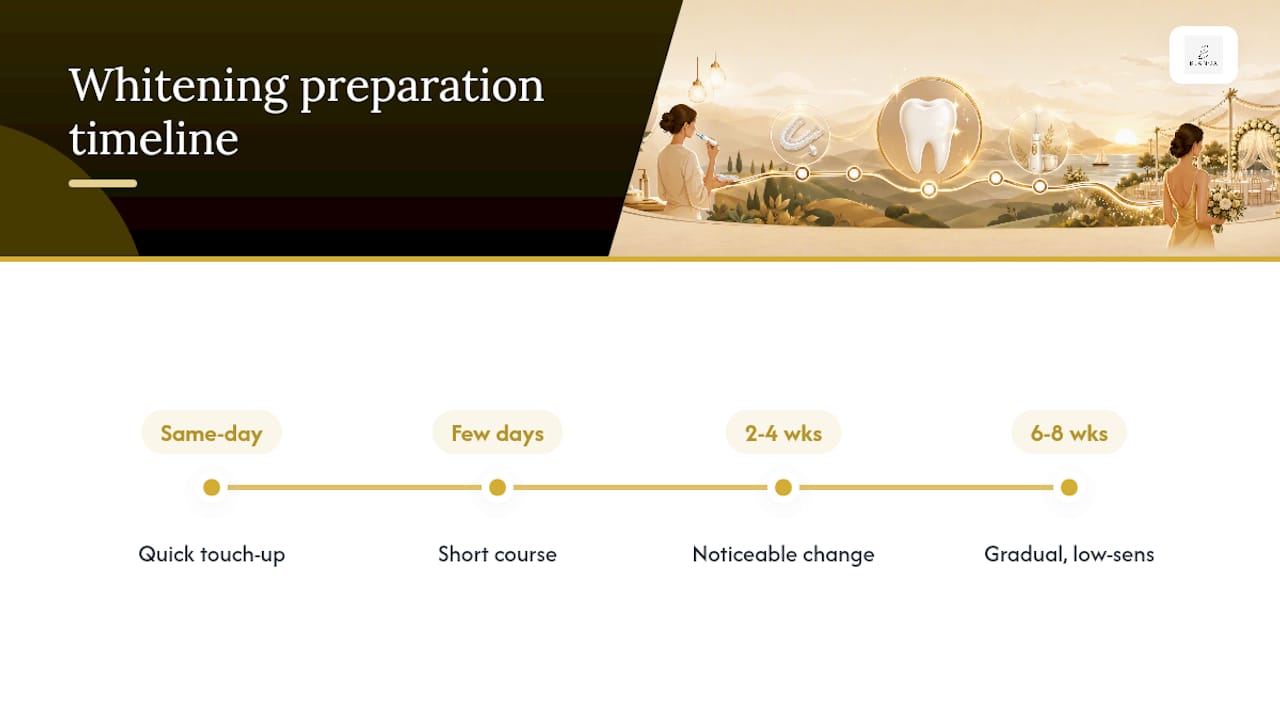
This brand was founded by dental professionals, and every timeline recommendation here reflects that background rather than guesswork. We built our wedding whitening timeline around a 6 to 8 week, low-sensitivity approach for anyone who wants gradual, dentist-backed brightening without the discomfort of rushing.
For readers working with less time, our event timeline breakdown maps same-day options through 4-week plans against real expectations, so you’re not guessing how far a strip or an in-office visit can actually take your smile before the date arrives.
What Are Your Options for Same-Day or Emergency Whitening?
There’s no safe way to whiten teeth dramatically in a few hours, and any product promising it deserves skepticism. What actually works on short notice is a combination of cosmetic and hygiene tricks rather than chemistry.
Start with a professional cleaning if you can get a same-day or next-day appointment. Removing surface plaque and light staining alone often brightens teeth noticeably, with zero sensitivity risk. A whitening toothpaste with mild polishing agents used the morning of the event can lift a small amount of surface stain from coffee or wine. Beyond that, focus on presentation: a warmer lip color reads as a cooler contrast against teeth, and matte lipstick tends to make teeth look brighter than glossy shades.
If you have a few days rather than a few hours, a single in-office session is still realistic and far more effective than anything sold as an “instant” fix. The safest emergency move is often accepting your current shade and using the tricks above to maximize it, rather than trying an unfamiliar product close to the event and risking uneven color or gum irritation on the day itself.
Who Should Avoid Whitening Right Before an Event?
Whitening close to a big event carries real tradeoffs that are worth knowing before you commit to a last-minute session. Anyone with untreated cavities or active gum disease should not whiten until those issues are resolved, since peroxide gel can worsen irritation on compromised tissue. People with crowns, veneers, or bonded teeth need to plan around the fact that those materials won’t lighten, which can create a visible mismatch if whitening happens too close to the date without a dentist mapping out the sequence.
Pregnant or breastfeeding individuals should check with a dentist before starting any bleaching regimen, and anyone with a known history of severe sensitivity should be cautious about a single aggressive session squeezed in right before travel or photos, since gingival irritation and sensitivity remain the most common side effects of peroxide-based products. The bigger risk with same-day timing specifically is chasing a dramatic change too fast and ending up with irritated gums or blotchy results on the one day you can’t hide them.
How Lighting and Photography Change the Way Whitened Teeth Look
Event lighting can make an identical shade of white look dramatically different depending on the room. Warm, incandescent lighting, the kind common in reception halls and ceremony venues, casts a yellow tone that can make even a freshly whitened smile look duller than it is. Cool, daylight-balanced lighting and outdoor settings tend to make the same teeth look noticeably brighter.
Camera flash adds another variable. Direct flash photography can wash out subtle shade differences entirely, meaning a moderate whitening result may look nearly identical to a more dramatic one in photos, while side lighting or natural window light shows true color variation more accurately. This is worth knowing before you assume a bigger investment automatically means a more visible payoff in your photos.
Skin tone and lip color also shift perception. Warmer lip shades create more contrast against teeth than cooler or glossy ones, which is why the “instant brighter” trick with lipstick works even without any whitening at all. If photos are the main motivation for whitening, factor in your venue’s lighting when deciding how dramatic a change you actually need.
The Timing Advice Most People Get Backwards
The biggest mistake we see isn’t starting too early. It’s starting too late and then compensating with intensity instead of time. People search for the fastest, strongest option when they’re two days out, when the actual fix was booking a consult three weeks earlier.
Conventional advice tends to treat whitening as binary: professional or drugstore, fast or slow. The more useful framework is matching method to your specific sensitivity history and your actual lead time, then building in a buffer for your shade to stabilize, since teeth continue rehydrating for a day or two after treatment. That buffer is what separates a smile that looks great in person and photographs unevenly from one that holds up under both.
If we’re being candid about what the research actually supports: a staged, moderate approach almost always beats a single high-intensity session for comfort and consistency. Prioritize the dental exam first, pick your timeline tier honestly based on the calendar, and treat sensitivity management as part of the plan, not a problem to solve if it happens.
— Blanca
Choosing a Blanca At-Home Option for Your Event
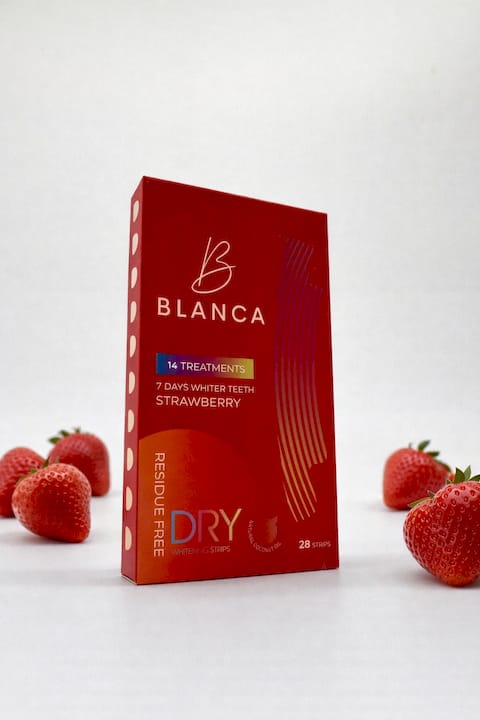
If your event is far enough out to skip the dentist’s chair, Blancawhitening’s at-home whitening collection gives you a guided, dentist-founded alternative that doesn’t require booking an appointment around your schedule. Strips fit the 4 to 6 week window well, while a fuller at-home kit suits the 2 to 4 week range if you want a more concentrated regimen with built-in sensitivity control.
Choose based on your own history: if you’ve had sensitivity before, start with a lower-frequency schedule and pair it with a desensitizing toothpaste, and if you have crowns, veneers, or active dental issues, talk to a dentist before starting rather than working around them with an at-home product. For a quick, approachable starting point, the Blush Berry flavored whitening strips are a straightforward way to begin a multi-week plan without committing to a full kit right away.
For anyone whose event is inside two weeks or who wants professional-strength results with oversight, book a dentist consult instead of relying on an at-home product to do a job it isn’t built for on short notice.
Sources
- CDA — Teeth whitening (for the public)
- Clinical review on tooth whitening (PMC)
- ADA — Whitening (oral health topics)
- Cleveland Clinic — How to whiten teeth
This article is general information, not a substitute for advice from a qualified doctor. Consult a qualified healthcare professional about your own circumstances before acting on anything here.
FAQ
How soon before an event should I whiten my teeth?
Most people should start 2 to 4 weeks out, which allows time for shade to stabilize and any sensitivity to fade. If you only have 1 to 2 weeks, in-office whitening remains the fastest reliable option.
What is the 3-3-3 rule for teeth?
This isn’t a term recognized by dental associations or clinical guidance, so there’s no standard definition to point to. Rather than following an unverified rule, base your timeline on the tiers above and confirm specifics with a dentist.
Do I really have to wait 48 hours after teeth whitening?
Yes, largely. Teeth continue rehydrating and the shade continues stabilizing for about 24 to 48 hours after treatment, so avoiding staining foods and drinks during that window protects your results.
What should I do before teeth whitening?
Book a dental exam and cleaning to rule out cavities or gum disease, flag any existing crowns or veneers, and mention sensitivity history or medications so your dentist or a Blancawhitening at-home plan can be adjusted accordingly.