

How to Read a Tooth Shade Guide and Find Your Match
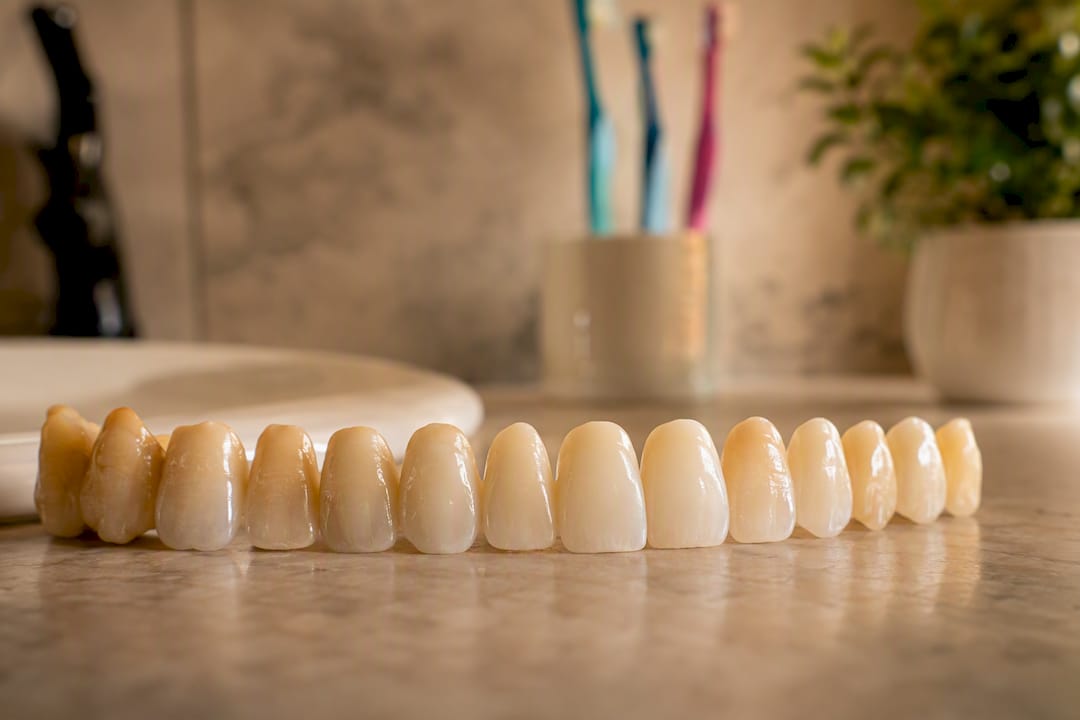
A tooth shade guide is a set of standardized color tabs dentists and patients use to identify and communicate natural tooth color, most commonly the VITA classical A1–D4 system or the more precise VITA Toothguide 3D-MASTER. If you want to check your shade right now, step near a window in daylight (avoid warm indoor bulbs), hold a shade tab or a printed shade chart against the middle third of an upper front tooth, and compare without staring longer than a few seconds.
- Use natural daylight or a north-facing window, never lamplight
- Hold the tab flush against the middle of the tooth, not the tip or gumline
- Glance, decide, and step back. Your eyes lose accuracy fast
Key Takeaways
Accurate shade matching depends on standardized lighting, a reproducible method like VITA 3D-MASTER, and knowing whether you’re chasing a restorative match or a whitening brightness target.
| Point | Details |
|---|---|
| Know your system | VITA classical A1–D4 covers natural hue and lightness; VITA Bleachedguide 3D-MASTER tracks whitening brightness instead. |
| Control the lighting | Check shade under daylight or a 5500K to 6500K lamp, never warm indoor bulbs. |
| Decide fast | Make shade comparisons within 5 to 7 seconds before eye fatigue skews the result. |
| Save precision for restorations | Crowns and veneers need a lab-grade 3D-MASTER match; whitening only needs a realistic brightness goal. |
| Track progress at home | Blancawhitening’s at-home whitening kits help you monitor brightness changes between professional visits. |
Table of Contents
- What Is a Tooth Shade Guide Used For?
- Decoding the VITA Classical A1–D4 Chart
- The Three-Step VITA 3D-MASTER Method Clinicians Trust
- Getting the Lighting and Timing Right
- Checking Your Shade at Home: What Works and What Doesn’t
- The Mistakes That Throw Off Even Careful Shade Checks
- When Precision Actually Changes the Outcome
- What Patients Get Wrong About “White” Teeth
- Tracking Your Whitening Progress at Home
- Frequently Asked Questions
- Sources
What Is a Tooth Shade Guide Used For?
A shade guide exists to put a shared number and letter on something that’s otherwise subjective: the color of your teeth. Without one, “off white” means something different to you, your dentist, and the lab technician making your crown.
- Restorative work (crowns, veneers, fillings) needs a precise shade match, because a lab technician who never sees your mouth in person relies entirely on the code you send them
- A mismatch here often means a remake, a second appointment, and a restoration that never quite blends in
- Whitening tracking uses a different tool entirely: the VITA Bleachedguide 3D-MASTER, built around defined brightness levels rather than natural hue
- That distinction matters because a whitening guide tells you how bright you’ve gotten, not whether you match your neighboring teeth
Restorative dentistry and whitening are solving two different problems, and mixing up the tools leads to disappointment on both fronts.
Decoding the VITA Classical A1–D4 Chart
The VITA classical system, still the industry baseline, splits color into two readable parts: a letter for hue family and a number for lightness.
- A = reddish-brown
- B = reddish-yellow
- C = gray
- D = reddish-gray
- Numbers run 1 to 4, where 1 is lightest and 4 is darkest
A shade like B1 sits at the lighter, warmer end of the scale, while B1 is generally lighter than A1 even though both share the “reddish” hue family. A D2 shade lands in reddish-gray territory, generally darker and more saturated than most A or B tones, which is why dentists rarely swap D-series and A-series shades casually. If you’re requesting a shade-matched crown or veneer, the letter tells your dentist which color family to start in, and the number tells them how much light that tooth reflects. Get either one wrong and the restoration reads as noticeably off, even to a casual observer.
The Three-Step VITA 3D-MASTER Method Clinicians Trust
The VITA classical guide is a good starting vocabulary, but it groups shades unevenly and skips some real-world combinations. The VITA Toothguide 3D-MASTER fixes that with a structured, three-step process built around how the human eye actually perceives color: lightness first, then saturation, then hue.
- Determine value (lightness). The clinician sorts through five lightness groups, numbered roughly 1 through 5, choosing the group that matches overall brightness before touching color at all.
- Determine chroma (saturation). Within that lightness group, fan-style samples reveal how much color intensity the tooth carries, from muted to saturated.
- Determine hue. The final step distinguishes warmer (L, for more yellow) from cooler (R, for more red) undertones, sometimes landing on an intermediate code like 4.5M2.
| Step | What it isolates | Why it comes in this order |
|---|---|---|
| Value | Overall lightness | The eye detects brightness differences before color differences |
| Chroma | Color intensity | Saturation is easier to judge once lightness is fixed |
| Hue | Warm vs. cool tone | Hue is the most subtle variable and is judged last for accuracy |
This order isn’t arbitrary. Peer-reviewed evidence on shade selection in esthetic dentistry backs the same sequence: value, then chroma, then hue, because tackling them out of order produces more disagreement between observers.
Getting the Lighting and Timing Right
Even the best chart fails under the wrong light. Clinicians follow a fairly rigid protocol, and it’s worth adopting at home if you’re trying to self-check before an appointment.
- Work under daylight or a calibrated daylight lamp in the 5500K to 6500K range; warm indoor bulbs skew everything yellow.
- Hold the shade guide roughly 25 to 30 centimeters from the tooth, arm slightly bent, tab angled parallel to the tooth surface.
- Take the shade before any tooth preparation or extended drying. Dehydrated enamel turns chalky white within minutes, throwing off the read.
- Make your decision within 5 to 7 seconds. Longer than that and your eyes start compensating for the color they’ve already seen, skewing the next comparison.
- Disinfect tabs between uses and remove obvious color distractions nearby, like a bright lipstick or a colored bib.
Pro Tip: If you’re checking your own shade at home before a dental visit, take the photo or comparison first thing, before coffee or teeth brushing dries out your enamel. A slightly damp, freshly rinsed tooth gives a more honest baseline than one that’s been exposed to air for twenty minutes.
Checking Your Shade at Home: What Works and What Doesn’t
A printed shade chart or a consumer shade card can get you into the right neighborhood, and it’s a reasonable first step before deciding whether whitening or a dental visit makes sense.
- Hold a printable shade chart or handheld card under the same daylight conditions described above, never under a bathroom vanity light
- If you’re using a phone camera, shoot in natural light with no filter, against a neutral gray or white background, and include a gray card or plain sheet of paper in frame as a reference point
- Skip flash entirely. It bleaches out subtle color differences and makes almost every tooth look artificially bright
- Understand the ceiling on this method: retail shade cards and phone photos are useful for tracking rough progress, not for matching a crown or veneer to millimeter precision
- If you’re preparing for restorative work, a professional shade determination using the 3D-MASTER system is the only reliable route
Consumer tools are a useful compass. They are not a substitute for the instrument a lab technician actually needs.
The Mistakes That Throw Off Even Careful Shade Checks
Most shade mismatches trace back to a small handful of avoidable errors, not bad luck.
- Wearing bright lipstick or a colored top during a shade check biases the eye toward or away from certain hues
- Comparing under mixed lighting, like a window on one side and a fluorescent overhead on the other, confuses even experienced clinicians
- Staring too long. Eyes fatigue within 5 to 7 seconds of comparing colors, and the longer you look, the more your perception drifts
- Skipping a second opinion. A colleague or assistant glancing at the same comparison catches drift the original observer missed
- Forgetting that the final restoration material has its own translucency, meaning the exact tab color doesn’t always translate one-to-one into the finished crown
Pro Tip: If your shade seems to sit right between two tabs, don’t force a choice. Document it as an intermediate shade (something like “between A2 and B2”) and let the lab decide with a custom blend. Guessing wrong here costs more time than being precise up front.
When Precision Actually Changes the Outcome
Not every shade decision carries the same stakes, and knowing which situation you’re in saves both money and disappointment.
- A crown or veneer on a front tooth demands lab-grade precision, because it sits next to natural teeth for years and any mismatch is permanent until replaced
- Restorative shade communication that’s vague or rushed is the single most common cause of remakes
- Whitening, by contrast, is measured on a brightness scale rather than a natural hue match, so the goal is a realistic brightness target, not an exact tab code
- If you’re planning both whitening and a restoration, sequence matters: whiten first, then match the restoration to your new baseline shade
What Patients Get Wrong About “White” Teeth
Healthy natural teeth were never meant to be paper white. Most people compare themselves to filtered photos or veneers, not to a realistic biological baseline, and that expectation gap causes more disappointment than any actual whitening result.
The classical A1–D4 range covers real, healthy tooth color. Bleached “Hollywood white” shades sit outside that natural spectrum entirely. For more on realistic expectations, our post on safely whitening after dental work walks through what a believable result actually looks like.
Tracking Your Whitening Progress at Home
Once you understand how shade guides work, tracking your own progress becomes far less guesswork and far more measurement. Blancawhitening’s at-home teeth whitening kits are designed for exactly this kind of self-monitoring: use a shade card or your phone under daylight before you start, then check again every week or two under the same conditions to see real movement on the brightness scale.
That said, at-home tracking has a ceiling. If you’re weighing a veneer, crown, or any restoration that needs to blend with the rest of your smile, a professional shade determination using the 3D-MASTER system isn’t optional, it’s the only way to avoid a redo. For everyday brightness goals, though, a consistent at-home routine paired with our best-selling whitening products gets you measurable, trackable results without a clinic visit. Start by picking a kit, take your baseline photo tonight in daylight, and check back in ten days.
Frequently Asked Questions
What does the letter in a tooth shade code mean? The letter indicates hue family: A is reddish-brown, B is reddish-yellow, C is gray, and D is reddish-gray. The number that follows indicates lightness, from 1 (lightest) to 4 (darkest).
Is A1 or B1 lighter? B1 is generally lighter than A1, even though both sit at the “1” lightness position, because the two hue families reflect light differently.
What is a D2 tooth shade? D2 falls in the reddish-gray category and reads darker and more saturated than most shades in the A or B families.
Can I determine my tooth shade guide match without a dentist? You can get a reasonable estimate using a printed shade chart or a phone photo taken in daylight with no filter, but a precise restorative match still requires a professional using the VITA 3D-MASTER method.
Why do dentists check shade before whitening or preparing a tooth? Tooth preparation and prolonged air exposure dehydrate enamel, which temporarily shifts its color lighter. Checking shade first captures the true baseline before that shift happens.
Sources
- VITA Zahnfabrik — Background knowledge
- VITA Toothguide 3D-MASTER — technical brochure (PDF)
- VITA Bleachedguide 3D-MASTER — VITA North America
- Shade selection in esthetic dentistry: a review — PMC