

What Accelerates Whitening Gels: 2026 Science Guide
Does LED light actually accelerate whitening gels?
The short answer: peroxide-based agents do the heavy lifting, and LED light does not provide a clinically significant whitening advantage over peroxide gel alone in most standard protocols, though it may increase tooth sensitivity.
Whitening gels contain either hydrogen peroxide or carbamide peroxide as their active ingredient. When applied to teeth, these compounds release active oxygen radicals that oxidize and chemically break down chromophores, the pigmented molecules responsible for tooth discoloration. The gel is the primary whitening agent. LED light’s role is to accelerate and complement that chemistry, not replace it.
Here is what the science actually shows:
- Evidence from 24 systematic reviews indicates no clinically significant whitening advantage to light activation over peroxide gel used alone in most standard protocols.
- An in-vitro study published in PMC found that blue light significantly increases bleaching rate and final whiteness level when combined with hydrogen peroxide, targeting chromophore fractions that peroxide alone cannot reach.
- LED light may increase tooth sensitivity without improving results in typical at-home use conditions.
- Effective acceleration depends on peroxide availability and contact time, not light intensity alone.
- Consistent, evidence-based protocols often outperform adding accelerators to a poorly optimized routine.
The distinction matters: blue light can accelerate whitening through direct photobleaching and photon-assisted oxidation, but clinical outcomes in real-world settings are more modest than in-vitro results suggest. Understanding this helps you set realistic expectations and choose the right approach.
Table of Contents
- How whitening gels work: the science behind the bleaching process
- Top LED teeth whitening kits and gels in the US market
- Best practices to maximize whitening gel results at home
- Safety considerations and managing sensitivity during whitening
- Blancawhitening’s expert guide to safe and effective at-home whitening
- How different acceleration methods compare
- Timing and duration: getting the most from each session
- How oral hygiene and pre-treatment preparation affect acceleration
- Post-whitening care to maintain and enhance accelerated results
- Blancawhitening brings dental-professional expertise to your whitening routine
- Key Takeaways
How whitening gels work: the science behind the bleaching process
The chemistry of whitening gels is more nuanced than most product labels suggest. Active oxygen radicals generated by peroxide compounds diffuse through enamel into the dentin layer, where they oxidize the double bonds of chromophore molecules, breaking them into smaller, colorless compounds. This is why contact time matters so much.
Key clinical insight: Whitening efficacy depends more on peroxide active oxygen availability and contact duration than on concentration percentage alone. Clinical outcomes show no direct correlation between peroxide concentration and shade change; longer, consistent exposure at lower concentrations can match the results of short-term high-concentration treatments.
Polymer carriers play a critical but underappreciated role. Polymers like PVP stabilize hydrogen peroxide through hydrogen bonding, controlling its release rate and preventing premature decomposition. This stabilization improves both safety and treatment predictability, giving the peroxide time to work where it is needed most.
pH level is another factor affecting gel whitening that most consumers overlook. Acidic gels accelerate peroxide decomposition and initial bleaching but can damage enamel microhardness and increase long-term staining susceptibility. Neutral to slightly alkaline formulations offer safer, more sustained whitening by controlling peroxide activity without roughening the enamel surface.
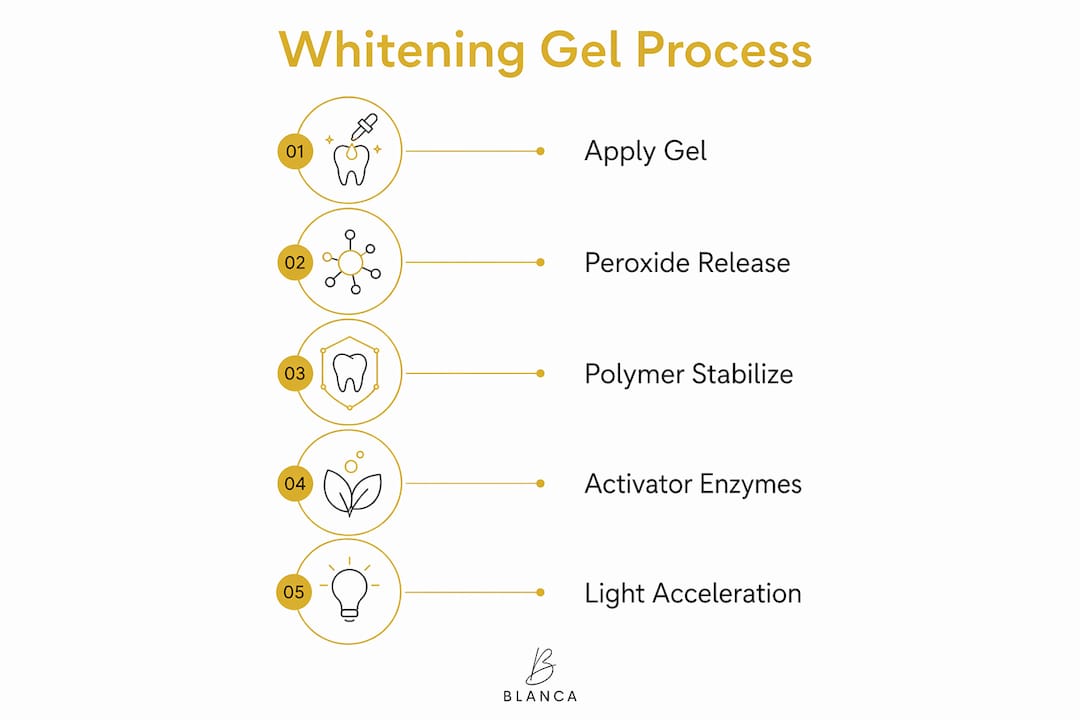
Chemical activators represent a newer frontier. Research shows that adding enzymes like peroxidase or catalase to a 35% hydrogen peroxide gel can increase bleaching effectiveness while simultaneously reducing the amount of residual peroxide that diffuses through enamel and dentin, lowering toxicity to pulp cells.
Top LED teeth whitening kits and gels in the US market
Several LED-assisted whitening products are widely available in the US, each with distinct formulations, light technologies, and intended users. Here is how the major options compare.
| Product | Type | Active Ingredient | Best For | LED Role | Availability |
|---|---|---|---|---|---|
| BLANCA Whitening Kits | Kit + LED mouthpiece | Hydrogen peroxide / carbamide peroxide | Overall, sensitive teeth | Accelerates peroxide activation | US & Canada |
| Colgate Optic White ComfortFit LED | Kit + LED mouthpiece | Hydrogen peroxide | Beginners, comfort-focused | Activates gel during wear | Widely available US |
| Crest 3D Whitestrips Professional White + LED | Strips + LED light | Hydrogen peroxide | Fast results | Supplemental light boost | Widely available US |
| MySmile LED Teeth Whitening Kit | Kit + LED mouthpiece | Carbamide peroxide | Budget-conscious users | Standard blue LED activation | Online, US |
| Novashine Professional Teeth Whitening Kit | Kit + LED mouthpiece | Carbamide peroxide | Sensitive teeth | Blue LED accelerator | Online, US |
| Auraglow Teeth Whitening Kit | Kit + LED mouthpiece | Carbamide peroxide | Beginners | Blue LED activation | Online, US |
A few notes worth knowing before you choose:
- Hydrogen peroxide acts faster but can increase sensitivity; carbamide peroxide releases more slowly and tends to be gentler for people with reactive teeth.
- LED mouthpieces in at-home kits typically operate at lower light intensities than professional in-office devices, which is why clinical trial results from office settings do not always translate directly to home use.
- Dentist-approved formulations and ADA-recognized products carry an additional layer of credibility for safety-conscious buyers.
- The ADA’s guidance on whitening recommends consulting a dentist before starting any whitening regimen, particularly for people with existing sensitivity or restorations.
Pro Tip: If you have sensitive teeth, look for kits that include a desensitizing gel or potassium nitrate in the formulation. Using the desensitizer before or after whitening sessions can significantly reduce discomfort without affecting your results.
Best practices to maximize whitening gel results at home
Getting the most from your whitening gel is less about intensity and more about consistency and preparation. Follow these steps to speed up the whitening process safely.
- Brush and floss before each session. Clean teeth allow the gel to contact enamel directly rather than sitting on plaque or debris. Dry your teeth lightly with a tissue or gauze before applying the tray; moisture dilutes the gel and reduces its effectiveness.
- Use the small dot method. Place a tiny dot of gel per tooth compartment in the tray. Overfilling causes gel to ooze onto gums, increasing irritation and wasting product. Less gel, applied precisely, delivers better contact and fewer side effects.
- Follow the recommended wear time exactly. Longer is not better. Exceeding the protocol does not accelerate results and raises the risk of enamel damage from overuse. Most at-home gels are formulated for 10–30 minute sessions.
- Use LED light as directed, not longer. If your kit includes an LED mouthpiece, activate it during the gel wear window. Running the light beyond the gel’s active period adds sensitivity risk without additional whitening benefit.
- Stay consistent over days, not hours. Repeated daily sessions within the recommended cycle produce more stable shade changes than sporadic intensive use. Enamel needs recovery time between treatments.
- Avoid staining foods and drinks for at least one hour after each session. Freshly treated enamel is temporarily more porous and absorbs pigment more readily.
Pro Tip: Review safe at-home whitening practices before starting any new whitening regimen. A few minutes of preparation can prevent weeks of sensitivity.
Safety considerations and managing sensitivity during whitening
Sensitivity is the most common side effect of whitening, and understanding its cause helps you manage it without abandoning your routine.
- Moderate peroxide concentrations of 25–35% achieve effective whitening with less tooth sensitivity compared to higher concentrations, according to meta-analyses. Higher is not safer or faster.
- Light activation can increase pulpal stress and sensitivity without meaningfully accelerating the bleaching reaction in typical at-home conditions.
- Prolonged gel exposure beyond recommended times risks enamel microhardness loss and increased surface porosity, which makes teeth more susceptible to future staining.
- Potassium nitrate and sodium fluoride are the two best-supported desensitizing agents, reducing whitening-related discomfort without affecting whitening outcomes.
- Avoid whitening if you have untreated cavities, exposed root surfaces, or active gum disease. These conditions allow peroxide to reach sensitive tissue more easily.
Safety principle from dental research: Dental professionals advise prioritizing enamel health over rapid whitening. Chasing quick results through overuse or excessive concentrations can cause long-term structural damage to teeth that is difficult to reverse.
If sensitivity persists beyond 24 hours after a session, pause the treatment and consult a dentist before continuing. Learning about common whitening side effects before you start puts you in a much better position to respond appropriately.
Blancawhitening’s expert guide to safe and effective at-home whitening
Blancawhitening was founded by dental professionals, and that background shapes every product recommendation and formulation decision. The goal is not the fastest possible result; it is the safest path to a result that lasts.
- Gel strength matched to sensitivity level. Blancawhitening’s kits use clinically appropriate peroxide concentrations, avoiding the overconcentration trap that increases sensitivity without improving shade outcomes.
- Evidence-based LED use. Blancawhitening’s LED-assisted kits are designed so the light works within the gel’s active window, not as a standalone whitening device.
- Neutral pH formulations. Products are formulated to minimize enamel microhardness loss while maintaining effective peroxide activity throughout the treatment session.
- Desensitizing support built in. Where sensitivity is a concern, Blancawhitening products incorporate potassium nitrate and fluoride to protect pulp tissue during treatment.
Pro Tip: Before starting any whitening protocol, review the key questions to ask about whitening safety. Knowing your baseline sensitivity level and any contraindications helps you choose the right product from the start.
How different acceleration methods compare
Not all acceleration methods work the same way, and understanding the differences helps you choose what is actually worth adding to your routine.
Blue LED light is the most common at-home accelerator. It works through two mechanisms: direct photobleaching of chromophores and photon-assisted oxidation, where light excites stain molecules into a higher energy state, making them easier for hydrogen peroxide to oxidize. The catch is that at-home LED devices operate at much lower intensities than clinical units, so the real-world benefit is more modest.
Heat has historically been used in professional settings to accelerate peroxide decomposition. Higher temperatures speed up the chemical reaction, but they also increase the risk of pulpal irritation and sensitivity. Most modern at-home products deliberately avoid heat for this reason.
Chemical activators such as manganese chloride, peroxidase, and catalase enzymes represent a more targeted approach. Research shows these substances enhance free radical release from hydrogen peroxide, increasing whitening effectiveness while reducing residual peroxide diffusion through enamel. This is an area of active development in professional-grade formulations.
Carbamide peroxide vs. hydrogen peroxide is less about acceleration and more about release rate. Hydrogen peroxide acts immediately; carbamide peroxide breaks down into hydrogen peroxide and urea over time, providing a slower, gentler release that suits longer wear times and sensitive teeth.
Timing and duration: getting the most from each session
Timing is one of the most controllable factors affecting gel whitening, and most people get it wrong in the same direction: too long, too infrequently.
Peroxide gel has an active window. Once the compound has released its available oxygen radicals, additional wear time produces no further whitening and only increases the risk of sensitivity. For most at-home hydrogen peroxide gels, that window is 10–30 minutes depending on concentration. Carbamide peroxide gels, because of their slower release, can be effective over longer wear times of 30–60 minutes or even overnight at lower concentrations.
The most effective approach is daily sessions within the recommended cycle, typically 7–14 days, rather than extending individual sessions. Single-application protocols produce similar whitening outcomes to repeated-renewal protocols, with reduced discomfort potential. Refreshing the gel mid-session rarely adds meaningful benefit and increases sensitivity risk.
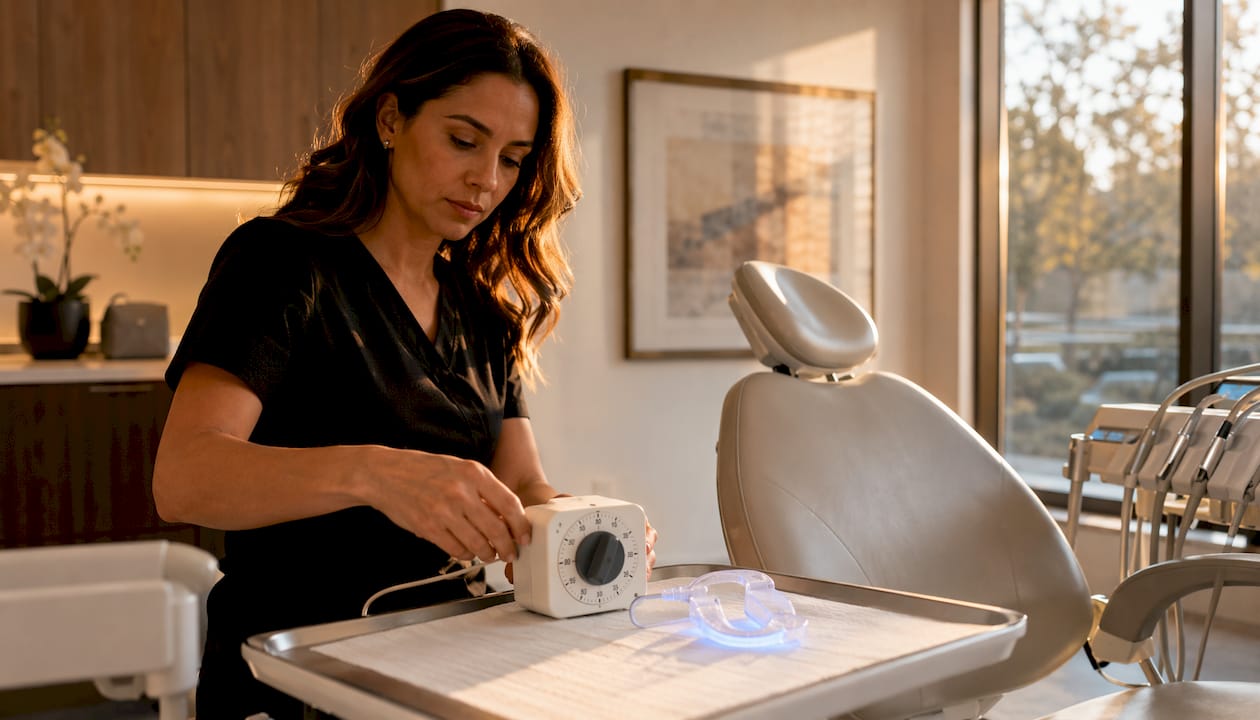
If you are using an LED mouthpiece, activate it at the start of the gel session, not after. The light’s photon-assisted oxidation effect works on the peroxide while it is actively releasing radicals, not once the reaction has slowed.
How oral hygiene and pre-treatment preparation affect acceleration
The condition of your teeth before you apply whitening gel directly affects how well and how quickly it works. Plaque, surface debris, and residual saliva all act as barriers between the gel and enamel, reducing contact efficiency and slowing the bleaching reaction.
Brushing with a non-abrasive toothpaste and flossing immediately before a whitening session removes these barriers. Drying the tooth surface lightly before tray insertion further improves gel adhesion. Saliva dilutes peroxide concentration quickly, so even a few seconds of drying makes a measurable difference in how the gel performs.
Pre-treatment with a hydrogen peroxide safe-use protocol also matters for people with existing restorations. Crowns, veneers, and bonding do not respond to peroxide the way natural enamel does. Whitening gel will not change their shade, which can create visible color mismatches if the surrounding natural teeth lighten significantly.
Post-whitening care to maintain and enhance accelerated results
Whitening results are not permanent, but the right post-treatment habits extend them significantly. The first 48 hours after a whitening session are the most critical. Enamel is temporarily more porous during this window, making teeth more susceptible to restaining from coffee, tea, red wine, and dark sauces.
Sticking to a “white diet” for 24–48 hours after each session, foods and drinks that are light in color, protects the results you have worked for. Rinsing with water after consuming any pigmented beverage also reduces staining risk.
Fluoride rinses used after whitening sessions help remineralize enamel and reduce sensitivity. Potassium nitrate toothpaste used in the days following treatment further supports pulp recovery. For long-term maintenance, touch-up sessions every 3–6 months with a lower-concentration gel are more effective and safer than repeating a full whitening cycle. Detailed guidance on making whitening results last can help you build a sustainable routine.
Blancawhitening brings dental-professional expertise to your whitening routine
If you have read this far, you already know that the best whitening results come from the right formulation, the right protocol, and the right support, not from the most aggressive product on the market.
Blancawhitening’s at-home whitening kits are built on exactly that principle. Formulated by dental professionals, they pair clinically appropriate peroxide concentrations with LED acceleration designed to work within the gel’s active window, not beyond it. Every product in the line prioritizes enamel health alongside visible results, so you are not trading long-term dental health for short-term brightness. Whether you are starting your first whitening cycle or looking for a more science-backed alternative to what you have tried before, Blancawhitening’s best-selling whitening systems give you a clear, professional starting point. Browse the full collection and find the kit that fits your sensitivity level and goals.
Key Takeaways
LED light accelerates whitening gels by activating peroxide chemistry through photobleaching and photon-assisted oxidation, but contact time, pH, and formulation quality determine the actual result.
| Point | Details |
|---|---|
| LED light role | Blue light can accelerate whitening through direct photobleaching and photon-assisted oxidation, but clinical evidence shows no clinically significant whitening advantage to light activation over peroxide gel used alone in most standard protocols, with real-world at-home benefits remaining modest. |
| Peroxide contact time | Whitening efficacy depends more on active oxygen availability and contact duration than on concentration percentage alone. |
| pH and polymer carriers | Neutral to slightly alkaline gels with stabilizing polymers like PVP protect enamel while sustaining effective peroxide activity throughout treatment. |
| Sensitivity management | Moderate peroxide concentrations with potassium nitrate and sodium fluoride reduce sensitivity without compromising whitening outcomes. |
| Blancawhitening approach | Dental-professional-formulated kits pair LED acceleration with clinically appropriate peroxide levels, prioritizing enamel health alongside visible results. |